Right from the start the intention was to display Akitsushima on a base. For a flying boat to be on deck the ship would be at anchor, and if you are going to build a seaplane tender you want to show the seaplane. Anchoring requires a water base, and in 1/72 scale part of the underwater hull would be visible below the surface. That determined the type of hull to build – not a full hull but not a waterline either, an intermediate form with a flat bottom to facilitate mounting to the base. Modeling a ship at anchor also dictates several other details such as flags, hatches, chain markings, crew activities, etc. Best to incorporate those right from the start and plan to get them right. The base was made from a sheet of 1/2″ plywood trimmed in oak. The minimum width was determined by the wingspan of the Emily (22.78″ or 57.7 cm) and the length was determine by what would fit into the bed of my truck (70.5″, or 179.1 cm), with allowances for a protective box. These measurements were then adjusted to allow for an acrylic dust cover to be fitted into slots at the edges of the base. Here is the wooden base with a sheet of clear acrylic “water” cut out in the shape of the hull.
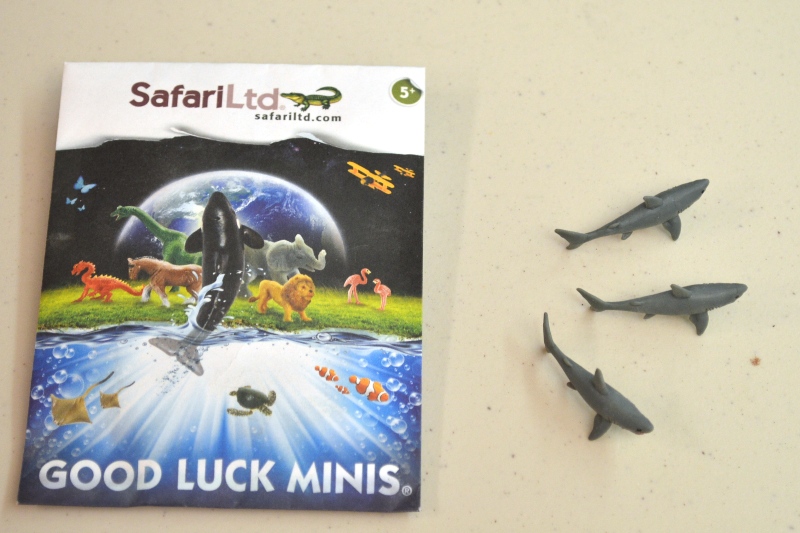
The ingredients used for making water were purchased locally with the exception of the Liquitex Gel Medium. This is an acrylic paint thickener used by artists and was used to simulate the water surface. It has a consistency similar to a thick hair conditioner and dries clear.The water on this base will have two surfaces – the upper layer will simulate the water surface and a lower level at the bottom to give some color and a feeling of depth. Here the lower layer is being built up with wood glue and paper towel.This is covered in Aluminum foil, shiny side up. The idea is to achieve an undulating reflective surface. When viewed through the uneven surface layer, the refraction and optical distortion gives a feeling of depth.Color was added by applying a mix of the acrylic floor polish and the blue clothing dye. This was first laid down in a wet layer with a brush and allowed to collect in the depressions, then oversprayed with several additional layers through the airbrush. Bluing used in the sheet metal industry should also work.To add a bit of visual interest I added a few small sharks, something which is not at all uncommon in tropical waters. These were purchased from the gift store at a local museum. In 1/72 scale they are roughly 6′ (2m) in length, a fairly realistic size. These were pinned and glued to ensure they stayed in place, if they came loose there would be no easy way to fix them.Akitsushima is mounted to her base using an entire bottle of Gorilla glue. Two of the three sharks are visible. The acrylic water surface is also there, but is so clear it is virtually invisible in this photograph.This is where the Liquitex Gel comes in. This was applied to the surface of the clear acrylic sheet to simulate the uneven water surface. It was carefully worked into the joint where the water and the hull meet to hide the seam and bond the two together.Here is the surface after drying for a day. The white areas will eventually dry clear, but I would caution anyone using the Liquitex Gel against laying down thick layers as they might not cure completely. One of the sharks is visible in this view, and the lower hull is visible through the water. The 13m utility boat will be shown rigged to a boat boom.
WHENEVER ANY FORM OF GOVERNMENT BECOMES DESTRUCTIVE OF THESE ENDS (LIFE,LIBERTY,AND THE PURSUIT OF HAPPINESS) IT IS THE RIGHT OF THE PEOPLE TO ALTER OR ABOLISH IT, AND TO INSTITUTE A NEW GOVERNMENT― Thomas Jefferson


Where do you display it after it is done?
LikeLiked by 1 person
It’s in my basement, it fits on top of one of my glass cases.
LikeLike