Sword Supermarine Seafire Build in 1/72 Scale Part II

One of the Seafires with the main round of sanding in the (sanding) dusts of history, ready for priming. Canopies were masked the traditional way with Tamiya tape, I find it hard to justify the prices of some mask sets for simple canopies. The bottom edges of the clear parts were blackened with a Sharpie, and the canopies fixed in place with superglue.
This is the underside of the spare parts Spitfire. Horizontal tails, cannon, exhausts, and landing gear are Eduard parts. The underside of the nose and smaller cooler are from Airfix. White parts are scratched from Evergreen stock.
As usual for my builds, I primed everything with Mr. Surfacer 1000 to check for flaws. With the prolonged sanding process it was no surprise to find several areas which needed more work. Perfect Plastic Putty helps with the canopy seams. After the sanding and restoration of panel lines, I hit the models with another shot of Mr. Surfacer to check again.
Once everything has been smoothed out it’s time to proceed to the painting stage. Yay! I like the painting stage. I have masked off the hard color separation on the undersides with Tamiya tape, and laid out the camouflage pattern with poster putty. If you look closely at the starboard wing you can see where a circular mask is in place to represent a roundel which has been painted over.
Two of the Seafires were painted in the post-war scheme of Extra Dark Sea Gray over Sky. The Gray tended to take on a blue hue which the Mr. Color shade lacked, so I mixed it with USN Intermediate Blue.
The Temperate Sea Scheme consisted of Dark Slate Gray and Extra Dark Sea Gray over Sky. The Dark Slate Gray is another mix, this time with Olive Drab. A darker mix was applied to the starboard wing to represent fresh paint for a painted-out roundel.
The Sword decal sheet is printed by Techmod, so there were no issues with the quality of the markings. I used the kit decals on four of the five Seafires. This is the exception, these markings are from Xtradecal’s Seafire sheet 72135.
I had some fun with the markings on the spare parts Spitfire. The decals on this one are from the spares box like the rest of the components, and most of those are from Eduard. RAF Wing Commanders were allowed to use their initials as the letter codes for their aircraft, so I sourced my own initials from Xtradecals RAF Sky Code Letters sheet 72189.
Most of the smaller parts had already been glued in place before the models received a panel line wash and flat coat. I have been putting more and more parts in place before painting whenever possible to ensure a strong bond. It’s a balance between ease of painting and the risk of breaking off parts.
And here’s the finished batch! You have to love the lines of the Spitfire, and the navalized versions lose none of the appeal in my book. The Sword kits take a lot of extra time to finish due to the disproportionate amount of parts clean-up required and fit issues. If you enjoy sanding and are good at filling seams they can be whipped into shape, but Tamagawa kits they are not. They are some extra work to finish but I like the way they turned out.

Part I here: https://inchhighguy.wordpress.com/2023/12/01/sword-supermarine-seafire-build-in-1-72-scale-part-i/

Sword Supermarine Seafire Build in 1/72 Scale Part I

Sword has packaged their Seafire line together, a total of five kits in one box. The kits were originally issued in 2011 – 2012, with this one you get a “batch in a box”, a good place to start if you want to build a series of Seafires.
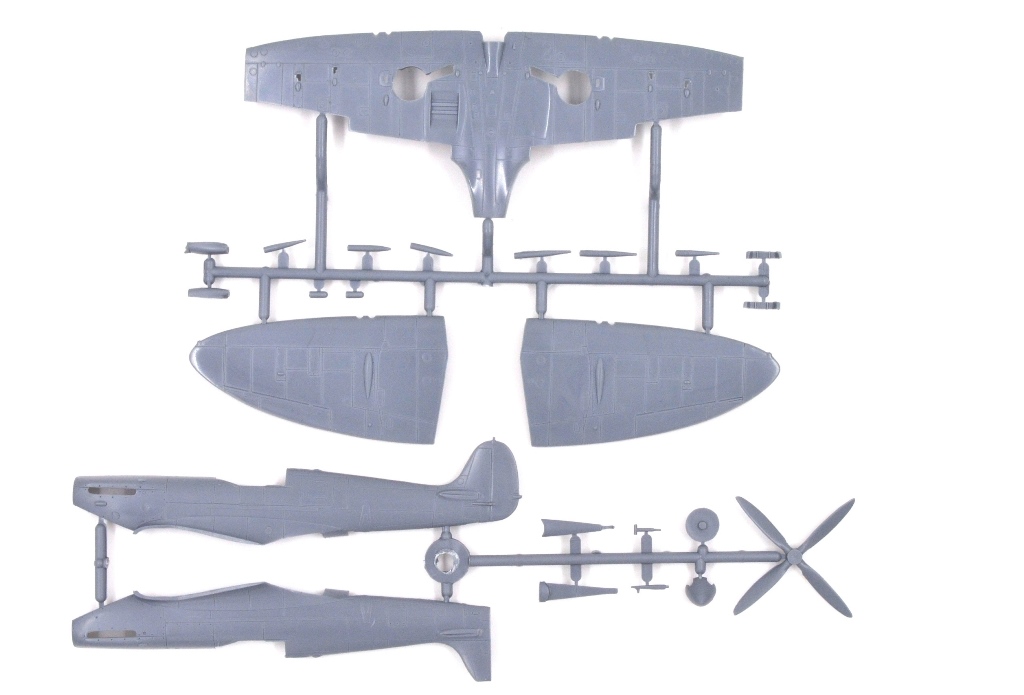
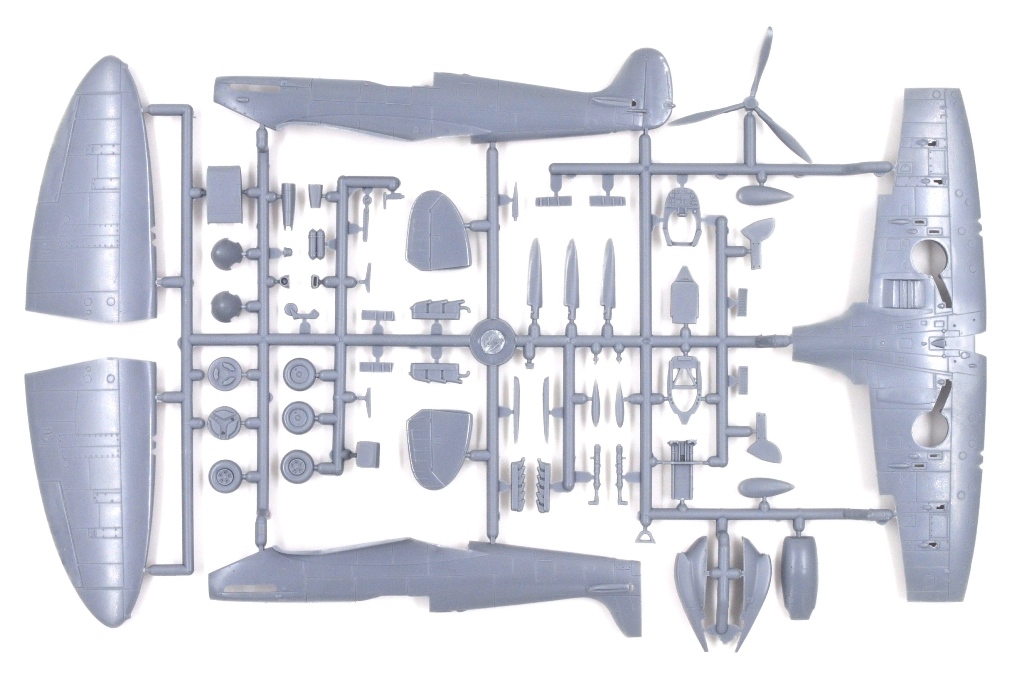
Inside the individual kits are each packaged in their own zip-lock bags. These are limited-run tools with no locating pins and a prominent mold seam which will have to be eliminated from each part. Plastic is soft. As you can see, there are parts provided for a variety of options. This sprue is common with Sword’s Spitfire, including the main fuselage & wing components, so modelers with the right decals could also make standard Spitfire marks from this boxing if desired.
The Seafire-specific parts are provided on supplementary sprues for each mark. This accounts for the many subtle detail changes for the Seafire, and will leave several Spitfire components for the spares box when done.
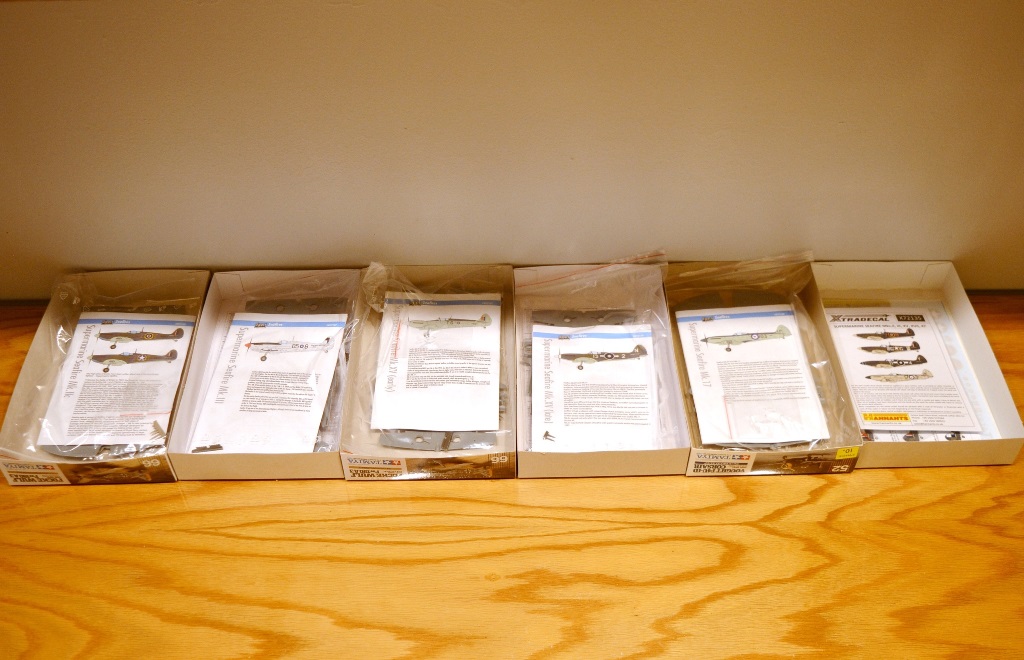
I’m often asked how I keep things organized during a batch build, so here’s a shot of the bench at the beginning of the build. I always start with a clean bench. I save spare top-opening boxes to use as trays, and each box has the parts and instructions for each subject. The spare box on the right holds any aftermarket and is used to collect unused parts until the build is over. The subjects are arranged chronologically, with the earlier versions to the left.
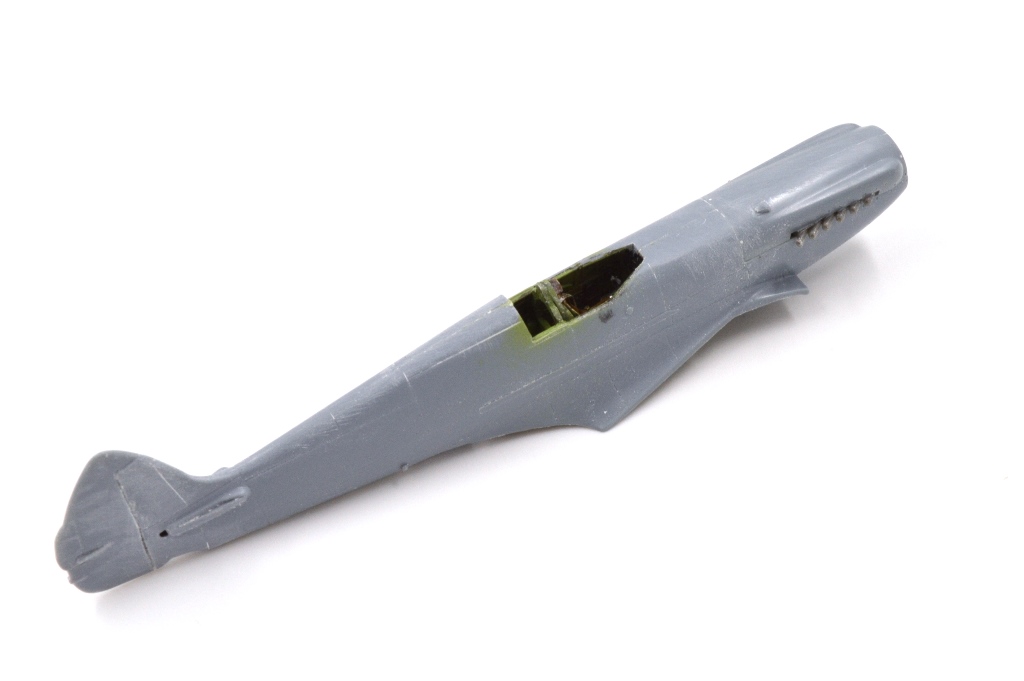
I was intrigued by the extra Spitfire components Sword provides in these kits, which included several fuselages and a complete set of wings, among several smaller components. I already have left over parts from both Airfix and Eduard Spitfires from previous builds, so I decided to see if it would be possible to cobble together an extra Spitfire from the spares. Here is a photo of the Sword cockpit on top, the surplus Spitfire on the bottom with a mix of parts from the spares box and a little scratchbuilding.
A painted cockpit ready to close up, with a set of Eduard PE belts added.
Sometimes it is easier to sand subassemblies separately, and this is the case with the fuselages on this build. I generally don’t enjoy sanding, and the Sword kits require the removal of mold seams, test fitting, and sanding for each component.
Fit of the wings left a lot to be desired and will require some extra effort to smooth out. Assembly was a low point for this batch, and it required considerably more time than usual to get past the sanding stage. This view provides a good look at the resin exhausts though, which are well detailed and sharply cast.
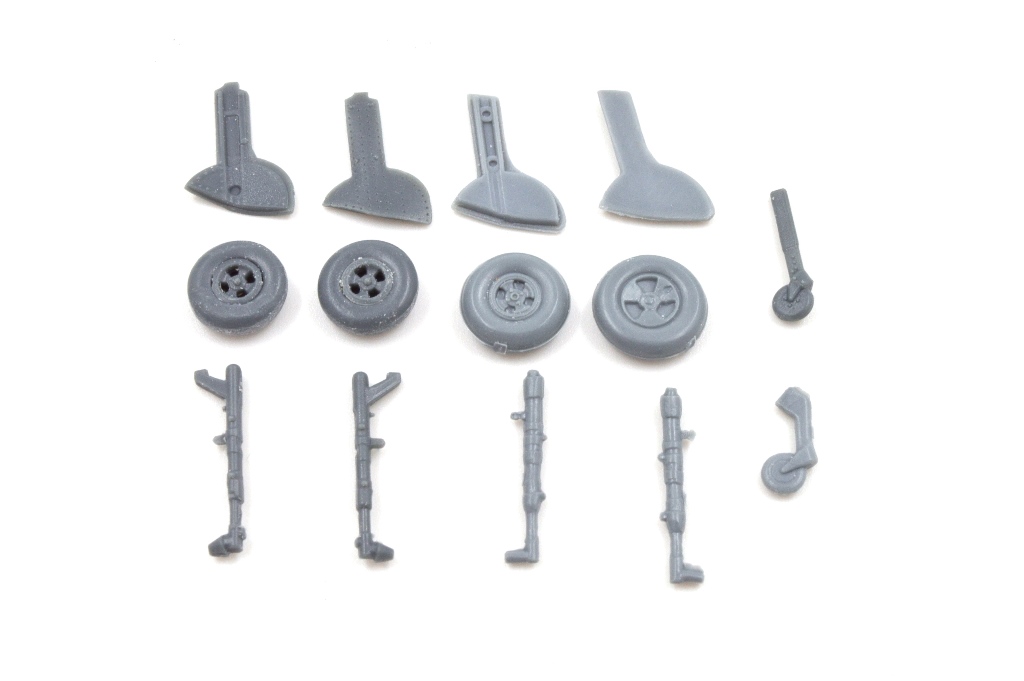
Since I was already raiding the spares box here is a comparison of the Eduard landing gear components with those from Sword. The Eduard parts are the darker plastic, they are better detailed and require little clean up. They are also slightly smaller. I used the Eduard parts where I could, partially due to sanding fatigue.
I needed another canopy for the extra Spitfire, and there were none left in the spares box or any of the Falcon sets I had on hand. I plunge molded one using a Sword canopy as a master, here is the set up ready to take the plunge.

Part II here: https://inchhighguy.wordpress.com/2023/12/08/sword-supermarine-seafire-build-in-1-72-scale-part-ii/

Airfix Fairey Swordfish Build in 1/72 Scale Part II

I got through the priming stage relatively unscathed, just a few areas to clean up here and there but nothing major.
I found a photograph of a Swordfish floatplane being hoisted aboard the battleship HMS Malaya which showed a lot of paint coming off the floats. I though this would add interest to my model. The floats were painted Alclad Aluminum and then Micro Liquid Mask was added where chipping was desired. After painting, the camo was pulled off using masking tape resulting in this chipped effect.
Mixes of Mr. Color paints were used.
The kit decals sniggled down after multiple applications of Micro Scale solvents. Stubborn areas receive Solvaset before they finally succumbed. The markings are for a Swordfish assigned spotting duties aboard the battleship HMS Valiant in July 1940.
Ancillary bits were painted as construction progressed. I did not intend to use the torpedo, but Airfix has provided a nice stand so I built is as an additional item to be displayed alongside the model.
I built up the folded wing sections as separate assemblies. The rigging was done with my go-to Nitenol wire, inserted into holes drilled into the wings and glued with Micro LiquiTape. The wings are meant to be fixed in place by trapping the tab on the left of the upper wing, I cut part of this off to fit the wings after the painting phase.
Here is the finished model. Folding the wings increases the complexity of the build, and this is a very delicate model to handle once everything is in place. My only beefs are with the instructions – the paint colors are called out only by the Humbrol numbers for the details in the construction steps, and there is no rigging diagram. Both these issues can be solved by downloading the PDF of the instructions for Tamiya’s 1/48 scale Swordfish on Scalemates as these are quite clear. Overall, a very nice kit from Airfix, and I may pick up another to do a Taronto raider.

More photographs here: https://inchhighguy.wordpress.com/2023/08/22/airfix-fairey-swordfish-of-hms-valiant-in-1-72-scale/

Airfix Fairey Swordfish Build in 1/72 Scale Part I

This is the new tool Airfix Swordfish, released in 2012. Airfix issued two versions, one with wheeled undercarriage and one with floats. Many naval aircraft of the pre-war era could be rapidly converted to wheeled or float configurations as conditions required, so a Swordfish floatplane is not as odd as it may first appear.
The Airfix trench digger was on holiday for this tool, if memory serves it was one of their earlier kits with fine panel lines. While the plastic is still a little soft the parts are well molded and detailed.
The sprues contain a generous assortment of armaments so the modeler can load out their Swordfish as they please. There are optional parts to facilitate building the kit with wings folded or extended, and a pair of jigs to help with aligning the center wing section.
The final sprue contains all the parts needed for the float configuration. Parts for the wheeled landing gear are not in the box, so there is no changing your mind later if you decide on a different version.
The interior is well detailed for the scale and everything fits nicely, which isn’t always the case with the complex “cage” structures. I assembled the cage before painting which required some care while painting the various colors on the floor and equipment, but there are enough openings that these can be accessed with a little extra effort. I added seatbelts and wires to the engine.
With the float supports in place the fuselage takes on an insectoid appearance. Everything fit well, the MEK I use to glue the parts works well with the soft Airfix plastic and little sanding is needed to hide the seams.
This is the “assembly complete” stage before painting, which struck me as odd given how much assembly is remaining to be done. I have decided to build this one with the wings folded which increases the challenge but will make for an interesting model.

Part II here: https://inchhighguy.wordpress.com/2023/08/18/airfix-fairey-swordfish-build-in-1-72-scale-part-ii/

Special Hobby Fairey Barracuda Build in 1/72 Scale Part II

Primer revealed some additional filling was needed on the upper part of the fuselage.
Mr. Color paints were used, with mixes for the uppersurface colors. The camouflage scheme was masked off using poster putty.
The Barracuda displays some unusual design choices. The undercarriage configuration is unique, I pinned it together to make sure it was strong enough. The flaps are free-floating and are positioned below the wing, another unusual feature. I found I had overlooked some of these parts during construction and had to add them later than I would have liked.
There are several parts which need to be positioned on the upper wings, I added these at the end of the build to avoid any problems with placing the decals. The bronze wire pins were used to make sure the parts didn’t get knocked off.
The unusual features of the design make this a more complex subject to model than most, but by the same token it results in an uncommon model.

More finished photos here: https://inchhighguy.wordpress.com/2023/07/04/special-hobby-fairey-barracuda-of-hms-illustrious-in-1-72-scale/

Special Hobby Fairey Barracuda Build in 1/72 Scale Part I

Special Hobby first released their Barracuda kits in 2016, this is their 2018 “Pacific Fleet” boxing. It is an unusual aircraft in many ways, and one which is not often seen at model shows. It has a certain awkwardness to its appearance which I find appealing.
The main sprues show a conventional parts breakdown. This is a limited run kit and features recessed panel lines where appropriate.
The third sprue consists of parts specifically for this boxing. This sprue is noticeably more refined and has sharper detail than the other two. There is a choice of bomb or torpedo for loadouts, and the underwing racks are provided but no smaller bombs for them. There are options for the wheels and a choice of three- or four-bladed prop.
The interior is adequate for a closed canopy build, I only added belts to the seats. Everything fits, but care is required to get the spacing right so the rollover brace behind the pilot will fit correctly.
Wheel wells are the full depth, parts are provided to build up the internal walls. I generally install the landing lights at this point in the construction so they can be sanded smooth and polished back to clear,
Fit is pretty good overall. For greenhouse canopies a good mask set is a must. These are from KV Hobbies and they performed well.
The seam on the underside of the fuselage was persistent and required some extra filling to smooth out. The seam runs down the inside of the cowl vent which is a difficult place to sand, so I covered the inside with a thin sheet of Evergreen.

Part II here: https://inchhighguy.wordpress.com/2023/06/30/special-hobby-fairey-barracuda-build-in-1-72-scale-part-ii/