![B35Build9[1]](https://inchhighguy.files.wordpress.com/2019/05/b35build91.jpg)
![B35Build10[1]](https://inchhighguy.files.wordpress.com/2019/05/b35build101.jpg)
![B35Build11[1]](https://inchhighguy.files.wordpress.com/2019/05/b35build111.jpg)
![B35Build12[1]](https://inchhighguy.files.wordpress.com/2019/05/b35build121.jpg)
![B35Build13[1]](https://inchhighguy.files.wordpress.com/2019/05/b35build131.jpg)
![B35Build14[1]](https://inchhighguy.files.wordpress.com/2019/05/b35build141.jpg)
![B35Build15[1]](https://inchhighguy.files.wordpress.com/2019/05/b35build151.jpg)
Part III here: https://inchhighguy.wordpress.com/2019/06/07/1-72-scale-amt-ertl-x-yb-35-build-part-iii/
Scale Modeling and Military History
Part III here: https://inchhighguy.wordpress.com/2019/06/07/1-72-scale-amt-ertl-x-yb-35-build-part-iii/
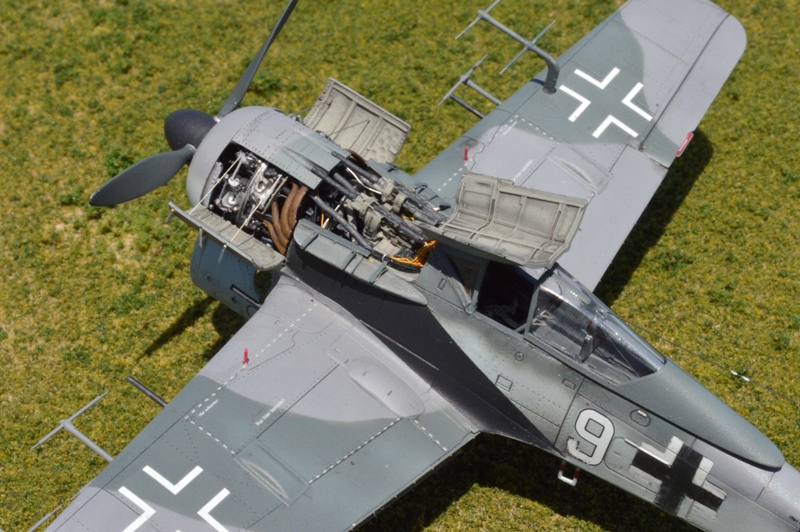
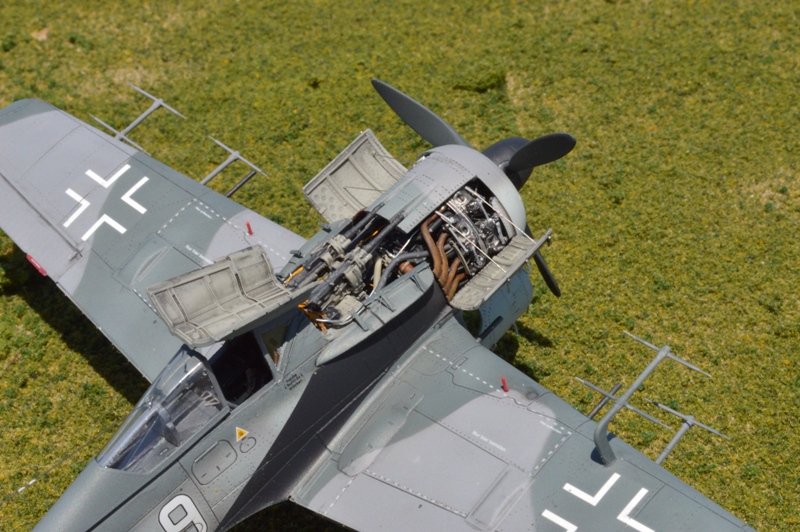
This is the Fw 190A-8/R11 Neptune of Ofw. Günther Migge, 1./NJGr. 10, Werneuchen Germany 1944. Migge ended the war with eight victories, all at night. The kit is Eduard’s Fw 190A-8 in 1/72 scale, with the Eduard resin engine and gun bay detail set. The radar arrays are Hasegawa supports with Albion tube and Nitenol aerials.
Eduard’s Fw 190s are the best 72nd scale 190s on the market today. They are well researched and molded. Eduard has gone to great lengths to provide the proper parts to accurately model each variant and to account for the differences in bulges and equipment. Detail is unsurpassed. Decals are the equal of anything on the aftermarket and the schemes are interesting. These kits are a bit fiddly to assemble, and will punish modelers who skimp on test fitting or parts clean up. There are specific areas which other manufactures have done better but in all, Eduard’s 190s are excellent offerings and the best place to start if you’re building an Fw 190.


Some nice color photographs of Boeing B-17G nose art from the 490th Bomb Group (Heavy). For the most part these Flying Fortresses are in unpainted natural metal with red identification markings. These photographs are one of the seemingly rare cases where all the relevant attributions are known. The artist was Master Sergeant Jay D. Cowan and the photographer was Captain Arnold Delmonico, both of the 490th Bomb Group. The photographs are preserved as part of the Roger Freeman Collection, Imperial War Museum.
In late August 1944 the 490th Bomb Group traded their Liberators for B-17Gs and began bombing German industrial targets. They were based at Eye, Suffolk until the end of the war. The Group then participated in food drops to famine-stricken Holland. After the war most of the aircraft pictured here were flown back to Kingman, Arizona and scrapped.


Part II here: https://inchhighguy.wordpress.com/2019/06/05/color-b-17g-flying-fortress-nose-art-of-the-490-bomb-group-part-2/
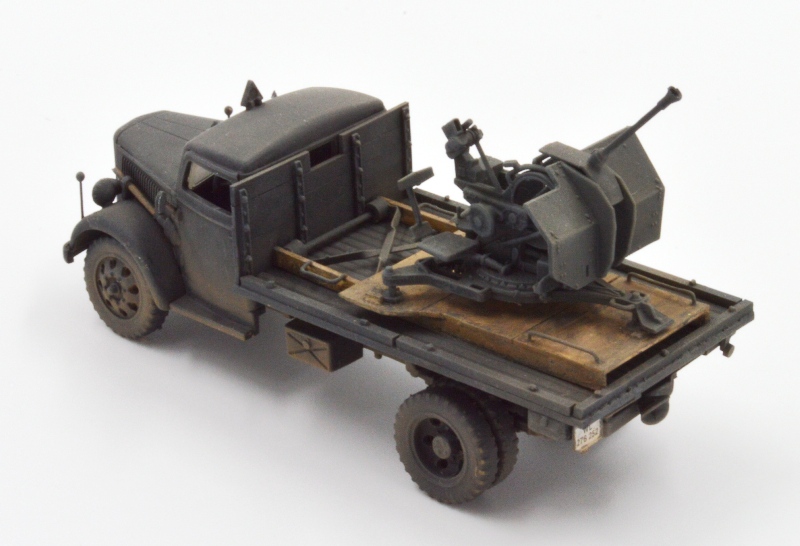
This is a conversion using the Academy Fuel truck and a Zvezda flak gun. I got this one for free from the LHS, the owner had bought this in a lot and it was missing some parts so he couldn’t sell it (thanks Brandon!). As I already had a couple fuel tankers I scratched up a bed and skid mount for the Zvezda 20mm gun and converted it into a flak truck. The gun is nice, but it would take some cutting to change the position. The only vice is it comes without ammo clips other than one molded into the base and another held by a figure. Fortunately I had one in the spares box so the gun can be loaded. I had a lot of fun building this one and liked the way it came out.


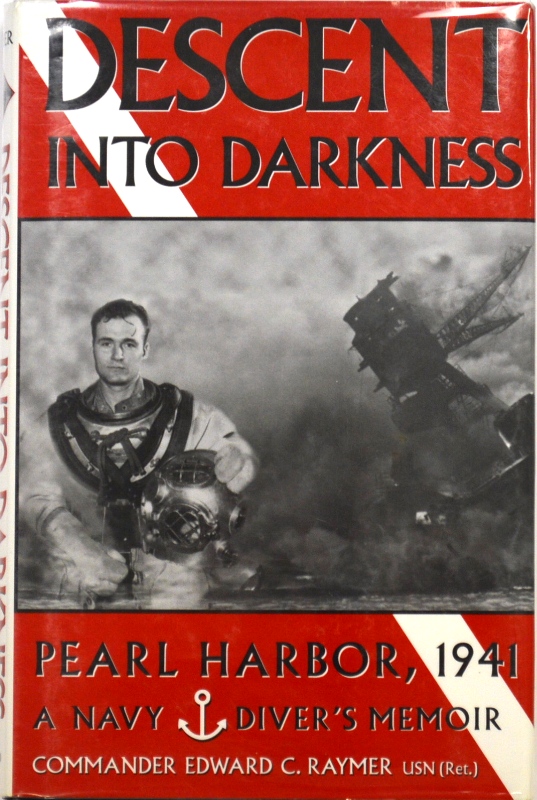
Descent Into Darkness – Pearl Harbor, 1941, A Navy Diver’s Memoir
Hardcover in dustjacket, 214 pages, illustrated
Published by Presidio Press June 1996
ISBN-10: 0891415890
ISBN-13: 978-0891415893
Dimensions 6 x 1 x 9 inches
Ed Raymer was a Metalsmith First Class and a trained diver. On the first day of America’s entry into the Second World War he and eight other divers boarded a plane in San Diego. Once airborne, they learned their destination was to be Pearl Harbor. Their assignment would be to dive into the battleships sunk there and assist in their salvage. This is his story.
While underwater welding and cutting were known skills, many of the problems encountered at Pearl Harbor were new. The divers improvised many techniques as the need arose, such as hydraulically stabilized eductors for burrowing through the mud under the hulls of sunken ships to inspect for cracks or using kapok to plug leaks while the ships were being dewatered. Their job was to assist in salvage of equipment and to prepare the ships for being refloated and repaired, if possible.
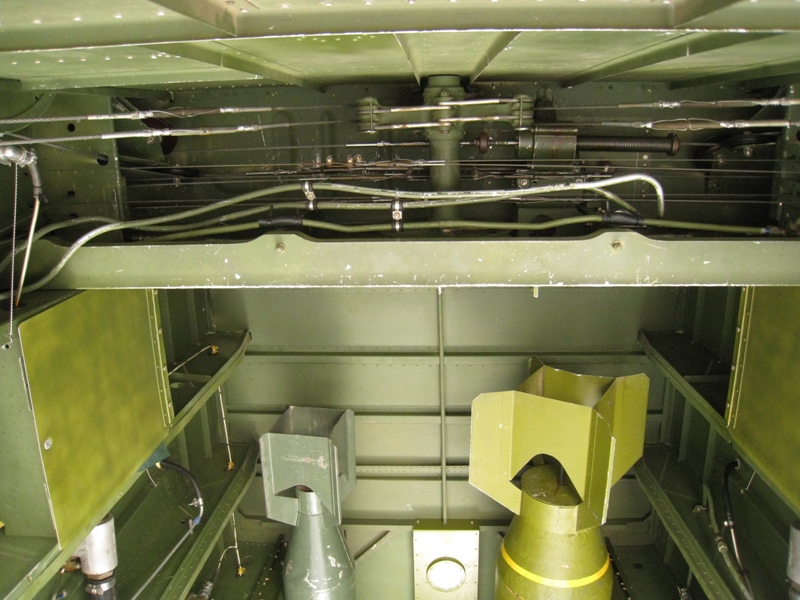
The work was inherently dangerous. The divers had to work in the dark, as oil and silt rendered lighting useless. A typical dive required the diver to navigate through the passages and compartments of sunken ship, underwater and blind. Hatches could jam, damaged equipment might shift, air lines had the chance to snag or be cut. The ship might be capsized, like the Oklahoma or Utah, or shattered like the Arizona. The tasks ranged included removing unexploded Japanese bombs or cutting into magazines to salvage projectiles. Underwater explosions could occur when a cutting torch ignited gas trapped in the ship. Some compartments contained the bodies of sailors which had to be recovered.
Raymer also describes the divers’ efforts to blow off steam in a Honolulu under martial law and the threat of war. Liberty was limited, alcohol was prohibited, and women were greatly outnumbered by the servicemen on their way to war.
An interesting break in the narrative occurs when Raymer volunteered to serve on a salvage detachment aboard the fleet tug USS Seminole (ATF 65). Seminole departed for the war zone in the Solomon Islands at the end of August 1942. Raymer was aboard when Seminole was sunk by gunfire from Japanese destroyers in October. There the narrative becomes somewhat surreal, as the survivors were put ashore on Guadalcanal. Outside of a formal command structure and supply chain, the divers operated small boats ferrying personnel and supplies to the island and completing other odd jobs. Raymer describes filling in for crewmen on PT boat patrols, helping repair the USS McFarland (DD-237), and rescuing survivors from the Battle of Guadalcanal. He assisted in making temporary repairs to the Heavy Cruiser USS Portland (CA-33). While aboard he collapsed from malaria and went along with Portland while she was repaired in Sydney. The narrative closes with Raymer’s return to the Salvage Unit at Pearl Harbor in April 1943 and the efforts to right the USS Oklahoma (BB-37).
This is an interesting first-person narrative of a side of the war not usually seen. Raymer writes honestly and openly, and includes several fascinating insights and anecdotes into a very unusual job in a very unusual time. Highly recommended.


Landing gear photographs here: https://inchhighguy.wordpress.com/2019/06/02/b-25j-mitchell-walk-around-landing-gear/


![B35Build1[1]](https://inchhighguy.files.wordpress.com/2019/05/b35build11.jpg)
![B35Build2[1]](https://inchhighguy.files.wordpress.com/2019/05/b35build21.jpg)
![B35Build3[1]](https://inchhighguy.files.wordpress.com/2019/05/b35build31.jpg)
![B35Build4[1]](https://inchhighguy.files.wordpress.com/2019/05/b35build41.jpg)
![B35Build5[1]](https://inchhighguy.files.wordpress.com/2019/05/b35build51.jpg)
![B35Build6[1]](https://inchhighguy.files.wordpress.com/2019/05/b35build61.jpg)
![B35Build7[1]](https://inchhighguy.files.wordpress.com/2019/05/b35build71.jpg)
![B35Build8[1]](https://inchhighguy.files.wordpress.com/2019/05/b35build81.jpg)
Part II here: https://inchhighguy.wordpress.com/2019/05/31/1-72-scale-amt-ertl-x-yb-35-build-part-ii/
This is Special Hobby’s 1/72 scale kit of the Brewster F2A-2 Buffalo. This is a limited run kit augmented with resin parts. A decent enough kit but a bit tricky to get together, and marred somewhat by the iffy fit of the clear parts. The sliding portions of the canopy here are vacuform replacements. The markings are for a VF-2 aircraft from the USS Lexington (CV-2) with a few substitutions from the spares box. VF-2 removed the long radio mast from the fuselage due to vibration, and landed the antenna to a stub mast mounted on the port wing.


Part III here: https://inchhighguy.wordpress.com/2020/03/11/douglas-sbd-dauntless-color-photographs-part-3/
Scale models, where they come from, and people who make them
Scale diorama tips and ideas
Let's build, and build again even if you won't build everything you have bought
A futile fight against entropy or 'Every man should have a hobby'? Either way it is a blog on tabletop wargames, board games and megagames
World War II with Scale Models
Illustrating Stories, Painting Miniatures, Reviewing Realms.
This is my ad free non-profit blog of my research notes on military history since April 2018.
Moving with the tides of history
Building and improving scale models
WHENEVER ANY FORM OF GOVERNMENT BECOMES DESTRUCTIVE OF THESE ENDS (LIFE,LIBERTY,AND THE PURSUIT OF HAPPINESS) IT IS THE RIGHT OF THE PEOPLE TO ALTER OR ABOLISH IT, AND TO INSTITUTE A NEW GOVERNMENT― Thomas Jefferson
Let's build and build again
This WordPress.com site is Pacific War era information
Scale Modeling and Military History
The best in WWII aviation history
Scale Modeling and Military History
Scale models from the sunny side of the Alps.
Scale Modeling and Military History
Scale Modeling and Military History
Scale Modeling and Military History
Scale Modeling and Military History
Scale Modeling and Military History
Scale Modeling and Military History
Scale Modeling and Military History
A blog about Modeling and life in general
