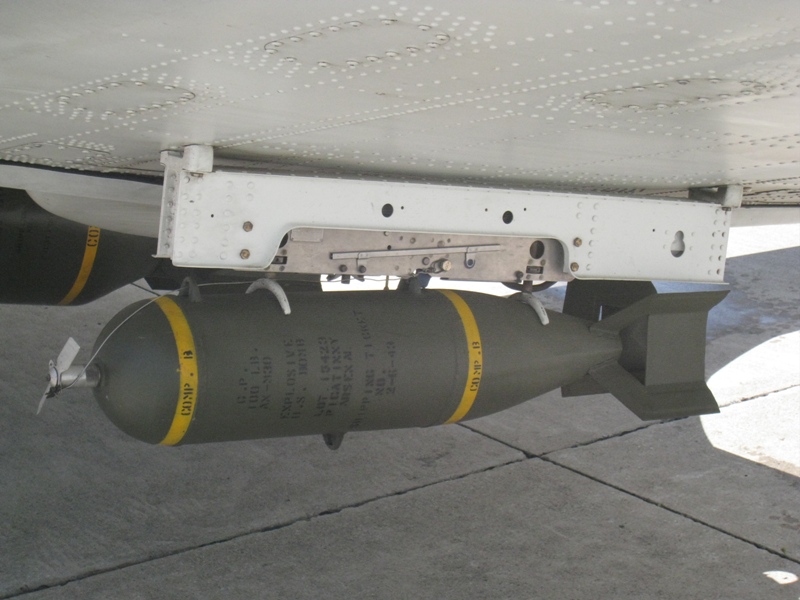
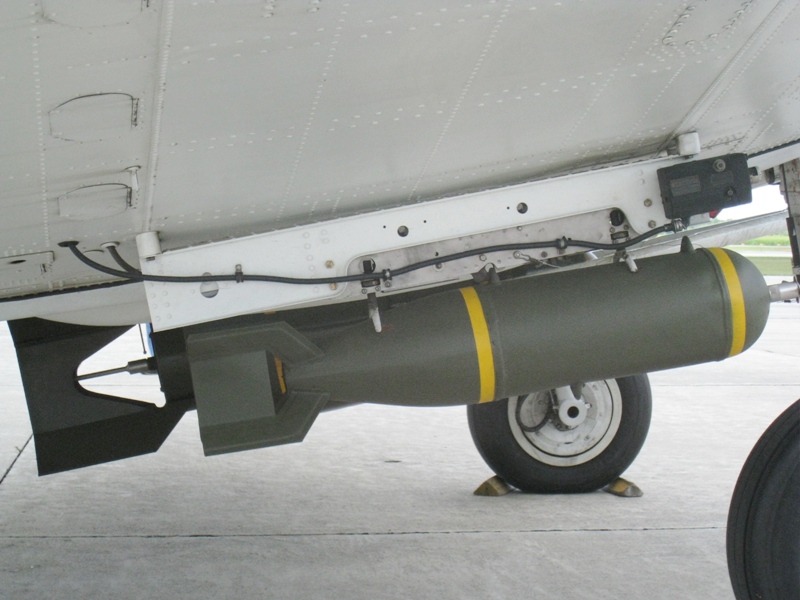
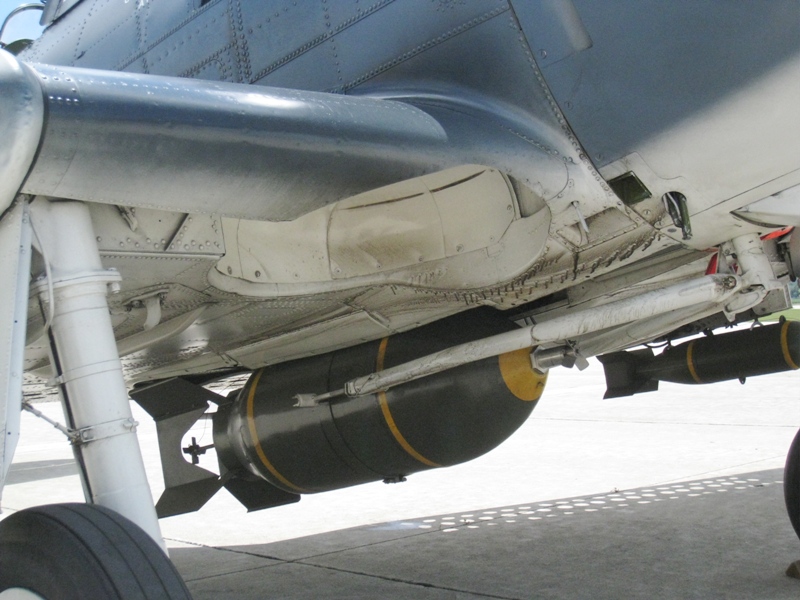
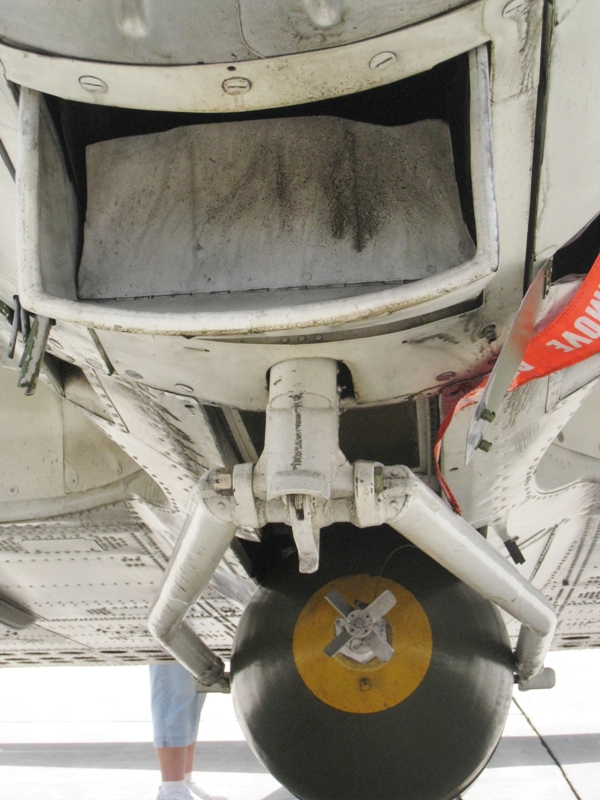
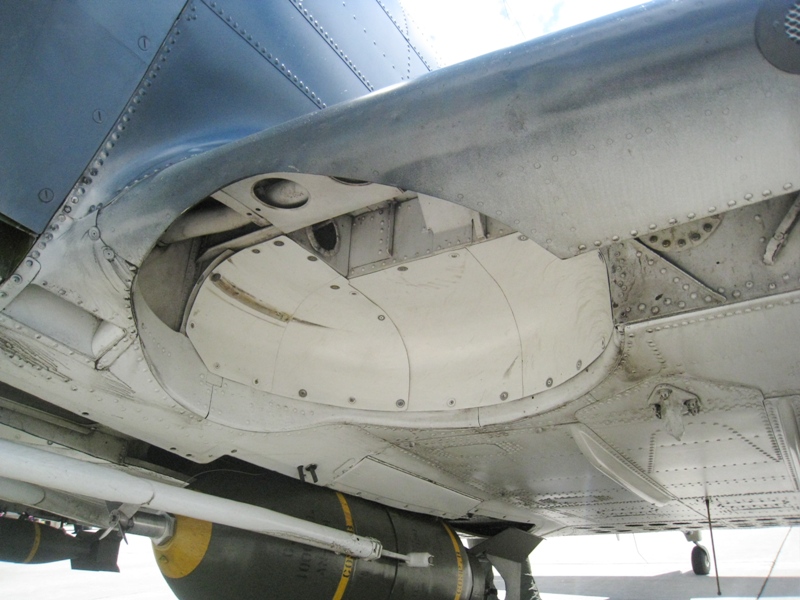
1/72 Scale Los Angeles Class Submarine Build, Part IV

688_031
The central core of the 688 SSN model is made from a 30 inch (76.2 cm) section of 5″ PVC well casing.  The outer diameter of this pipe is 5.563″ or 14.13 cm.  The stated hull diameter of the Los Angeles class is 33 feet (10.1 meters) so the pipe is oversized by 0.063″ or 1.6 mm, although this is mitigated by the addition of rubberized hull coatings designed to absorb sound so I am happy with it.  I also constructed a work stand from scrap lumber, necessary to prevent the hull from rolling around the work bench.
688_032
A lip was made from a 1 inch (25 mm) band of scrap plastic to increase the bonding area for the vacuform bow and stern sections.  This band was built up with additional strips of scrap until the outer surfaces of the finished pieces were level.  MEK from the hardware store was used to glue all these pieces, it reacts well to both the PVC in the pipe and in the sheet and ensures an outstanding bond.  It is the active component of most thin hobby glues, only much, much cheaper when bought in bulk.
688_033
The vacuforming process stretches and thins the sides of the formed plastic, so additional spacers were added to compensate on the hull sides.  The 0.060″ sheet had thinned to 0.040 – 0.045″ on the sides.  Easier to get things level now than to file and fill later, although that is inevitable in modeling.
688_034
The bow and stern sections were cut loose from the backing sheets and trimmed to fit as best as possible.  The seams were backed with more scrap strip.  Here is the stern section with the strip clamped in place while the MEK sets up.  I found that this did not take long, I was able to alternate between the bow and stern assemblies and keep working.  Note the screw head on the pipe in the picture.  This will be one of the anchoring points for the base.  Inside the pipe a nut and washer have been epoxied in place and the long screw is  tightened down while the epoxy sets.
688_035
Here the halves of the bow sections have been joined in place and are taped to the hull while the glue sets.  I kept the bow and stern sections removable at this point to allow me to fill the ends of the pieces with casting resin.  This helps solidify the assemblies at their weakest points and prevent any splitting while sanding.  If you use this method you must make certain that the pieces are completely sealed, as the resin will find even the slightest gap and leak out.
688_036
The completed sections are test fit and posed with the sail master.  Alongside is the Mobeus Skipjack for comparison.  The Los Angeles boats are longer and have a greater hull volume, but also have a much smaller sail structure.

Part V here: https://inchhighguy.wordpress.com/2019/04/05/1-72-scale-los-angeles-class-submarine-build-part-v/

Hasegawa Heinkel He 111H-6 in 1/72 Scale

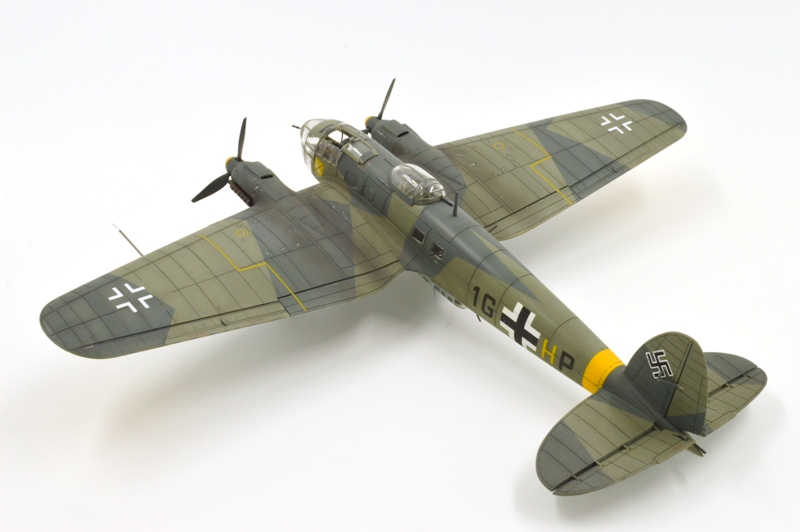
This is Hasegawa’s 1/72 scale Heinkel He 111H-6 modeled a machine of 6./KG 27 operating on the Eastern Front during 1941.  Typical Hasegawa quality, nicely detailed and with a good fit.  The kit has been criticized in some circles for the depth and width of the engraved panel lines, which some view as excessive.  Interior details were enhanced with Eduard photoetch.

He111_2


He111_1


DSC_1303


DSC_1304


DSC_1305


DSC_1306


DSC_1307


PZL M-15 Belphegor

M15_01
A serious contender for the title of the world’s ugliest aircraft is the PZL M-15 Belphegor.  It was the result of a Soviet specification for an agricultural aircraft with a requirement for jet propulsion.  The “low and slow” crop dusting mission profile conflicting with the typical operating parameters for jet propulsion produced several design compromises.

lala1-1
Poland was the main producer of agricultural aircraft for the Soviet bloc, so the design work fell to WSK PZL-Mielec.  The engine dictated for use to the design team was the Ivchenko-Progress AI-25, the same engine which powered the L-39 Albatros jet trainer.  To test the engine under low-speed low-altitude conditions an An-2 was modified with a new lattice rear fuselage, redesigned tail surfaces, and a large intake on the starboard side of the fuselage producing yet another uniquely unattractive aircraft.

M15_03
The aircraft is named after the demon Belphegor, likely due to the design’s lack of aesthetics.  Here is video of the M-15 in flight:  https://video.search.yahoo.com/yhs/search;_ylt=AwrCxGGzVplcYE8A61QPxQt.;_ylu=X3oDMTB0N2Noc21lBGNvbG8DYmYxBHBvcwMxBHZ0aWQDBHNlYwNwaXZz?p=PZL+M-15+Belphegor&type=sbc_dsl&hspart=att&hsimp=yhs-att_001&ei=UTF-8&fr=yhs-att-att_001#id=8&vid=cc8d1a0e6470b2637ebe7ef75e485d7a&action=view

M15_04
Series production ran from 1976 through 1981.  3,000 were ordered but only 175 were built due to disappointing performance.  None are believed to be flightworthy today although several are preserved in museums.

M15_05
Two large tanks for chemicals were positioned between the wings which carried a respectable total capacity of 750 gallons (2,900 liters).  The aircraft could be configured with various spray systems to optimize the distribution of the specific chemicals.  Provision was made for two technicians to be carried in the fuselage to operate the spray systems if necessary.

M15_06
Performance was adequate for an agricultural aircraft, was but shockingly slow for a jet.  Maximum speed was only 124 mph, cruising speed was in the 90 – 100 mph range.  Payload was an impressive 6,000 pounds.

M15_07
The Belphegor could lay claim to some unique niches in aviation history.  It was the only production jet biplane, it was the only jet crop duster, and it was the world’s slowest jet aircraft.

Hasegawa M3 Stuart Light Tank in 1/72 Scale

This is Hasegawa’s M3 Stuart light tank, a little long in the tooth by today’s standards.  The suspension fought me on this one.  For starters, all the open spokes on the wheels are molded closed.  If you’re modeling a USMC Stuart this can be correct, Marine units welded plates between the spokes to prevent Japanese infantry from jamming the wheels with logs.  I drilled and cut mine open.  The tracks are the rubber band type, to be joined by “crushing the caterpillars with a heated driver” according to the instructions.  I joined mine using the time-honored method of melting the ends off and then pinning them in place with brass rod.  The return rollers are also pinned in place with larger brass rods, as the track tension kept stripping them off.  Other than that, lots of detail bits added, as can be seen in the pictures.  There are some shape issues, but it makes a cute little tank in the end.

VehiclesAllied_037

DSC_1337

DSC_1338

DSC_1339

DSC_1340

Burma Road 1943–44: Stilwell’s assault on Myitkyina Osprey Campaign 289 Book Review

Burma Road 1943–44: Stilwell’s assault on Myitkyina Osprey Campaign 289

By Jon Diamond, Illustrated by Peter Dennis

Series: Campaign Book 289

Paperback, 96 pages

Publisher: Osprey Publishing January 2016

Language: English

ISBN-10: 1472811259

ISBN-13: 978-1472811257

Dimensions: 7.2 x 0.3 x 9.9 inches

Another volume in Osprey’s well known and extremely successful Campaign Series, Burma Road 1943-44 follows the established format.  The book is broken up into sections first detailing the commanders, forces, and plans, then describing the campaign itself and the aftermath.  The book is well illustrated with maps and beautiful two page color paintings by artist Peter Dennis.  Color maps are a vital feature, and are used to illustrate opposing troop movements and the battles progressed.

During the Second World War China received a meager proportion of American aid when compared with other Allied nations.  Part of this was due to the divided political nature of the Chinese war effort, part of it was due to the entire Pacific Theater being viewed as a lesser priority.  A more practical reason was the fact that the Japanese controlled all the usable ports along the coast making supply from the sea impossible.  Efforts to form an air bridge were only possible over harshest terrain and were subject to aggressive Japanese fighter interception, and these efforts could only provide a small portion of the tonnage required.

This book tells the story of the campaign to open the Ledo road through Burma, vital for Western efforts to provide material aid to the Chinese fighting against the Imperial Japanese Army on the mainland.  The book mainly focuses on the American efforts, although there is some detail on the British and Chinese contributions to the campaign.  I was particularly interested in the Chinese-American armored unit formed on the M3 Stuart, and the use of American Nisei as signal intercept technicians.

Overall a good introduction to the subject and an interesting read.

dsc_1259

1/72 Scale Los Angeles Class Submarine Build, Part III

688_021
One thing which is missing from most models of modern submarines is the flood vents on the bottom of the hull.  These are similar to the wheel wells on model aircraft in that they are difficult to see on the finished model.  Add to that the difficulties in referencing details on submarines and most kit manufacturers just skip them altogether.  Fortunately the prints we are using show the locations, here I have used masking tape to transfer the measurements to the vacuform hull components.
688_022
The corners were drilled out and then the centers were opened up with a Dremel.  From there the holes can be expanded with an Exacto blade.  The plastic sheet we used to make the vacuform piece had not stretched much on the bottom surface and was still close to the original thickness of the sheet.  I expect it will be thinner on the sides.
688_023
The holes are closed off with a sheet of plastic applied from the inside.  This prevents the see-through look and offers support for the 0.015″ strip louvers.  Any areas which need it can be built back up with superglue.
688_024
Progress has also been made on the various diving planes. These are the masters before priming, made from Evergreen stock and superglue.  Since we will be building both a Flight I and a Flight III boat there will be differences in the planes needed for each model.  The masters will be copied in resin to provide all the finished pieces required.

Part IV here: https://inchhighguy.wordpress.com/2019/03/29/1-72-scale-los-angeles-class-submarine-build-part-iv/