First to Fight Sd.Kfz. 247 Build in 1/72 Scale

This is the First to Fight kit number PL1939-059 molding of the Sd.Kfz. 247 Ausf. A, a newer kit first released in 2018. It is a rather uncommon type which was not produced in large numbers and was rarely seen in later campaigns. Only twenty were produced.
The parts layout is straightforward. The suspension is simplified which speeds construction. Unless you’re planning on showing the vehicle on its side this should not be a problem. The kit includes two crew figures, which are always welcome.
I am planning on modeling this one as an abandoned vehicle, so I’ll be opening up the doors and the driver’s visor. Here I have removed the doors from the body and begun chain drilling the visor. This will be opened up with an exacto knife.
The doors are in upper and lower sections to account for the kink in the hull. I replaced the handles on the pioneer tools as these were molded with undercuts to clear the mold. Fender indicators are insect pins.
Another view after priming with Mr. Surfacer 1000. Towing hooks were made from wire and added front and back.
The basic camouflage during the Polish campaign was Panzer Gray with Brown covering 1/3 of the vehicle. In grayscale there is little difference between the two colors so this is often unnoticed in black and white photographs.
A finished picture after decals and weathering. The model was given a black wash followed by a tan mud wash, then a thin layer of “dust” was sprayed over the whole thing. The rolled-up tarp is made from masking tape.

ICM Sd.Kfz. 222 Build in 1/72 Scale

ICM first released their Sd.Kfz.222 kit in 2005 as kit number 72411, this is the 2011 reboxing. These were often used in the reconnaissance role, and would be just the thing for those times when you’re trapped on a country road behind a slow driver!
The parts are well-molded and the breakdown is conventional. ICM have included photoetch for the engine vent in the hull and the grenade screen atop the open turret. Both of these PE parts are useful and appropriate for the intended applications.
Assembly was quick and the fit was good with no surprises.
The model was primed with Mr. Surfacer 1000 and then base coated with Alclad black primer. Thin coats of Panzer Gray misted on will allow for this to provide darker shadows in the recesses if applied carefully.
Here is the effect of lighter shades thinly misted on over the black base coat. Highlights were picked up with drybrushing.
Here is the finished model with an application of mud and dust. Everything was sealed and unified with Testors DullCoat. The radio antenna is Nitenol wire.

Sd. Kfz. 9 FAMO Halftrack Dioramas in 1/72 Scale

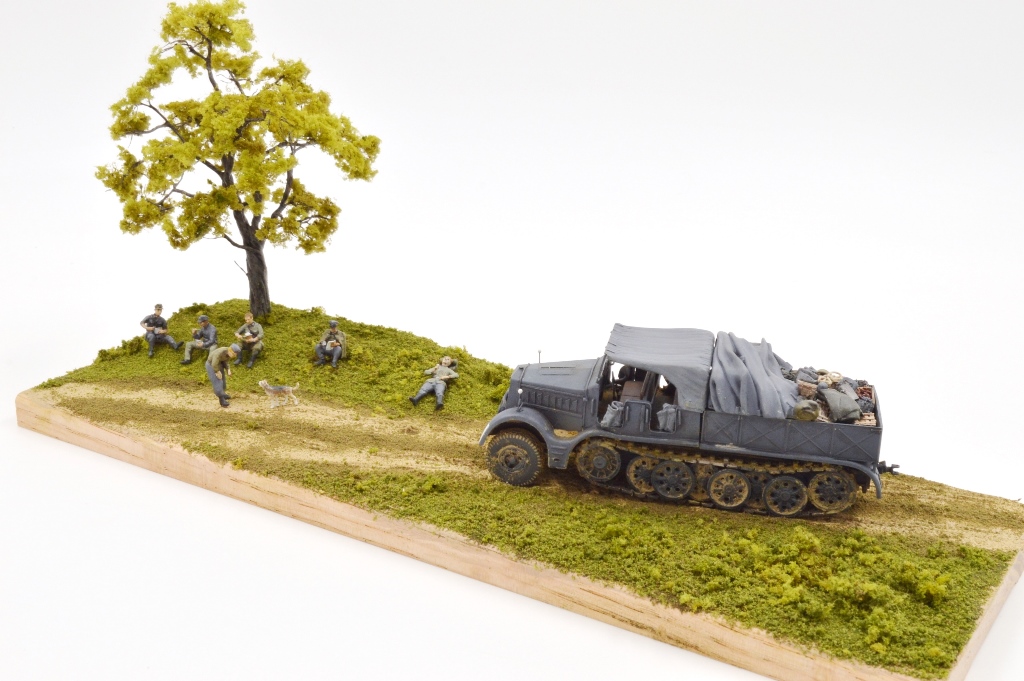
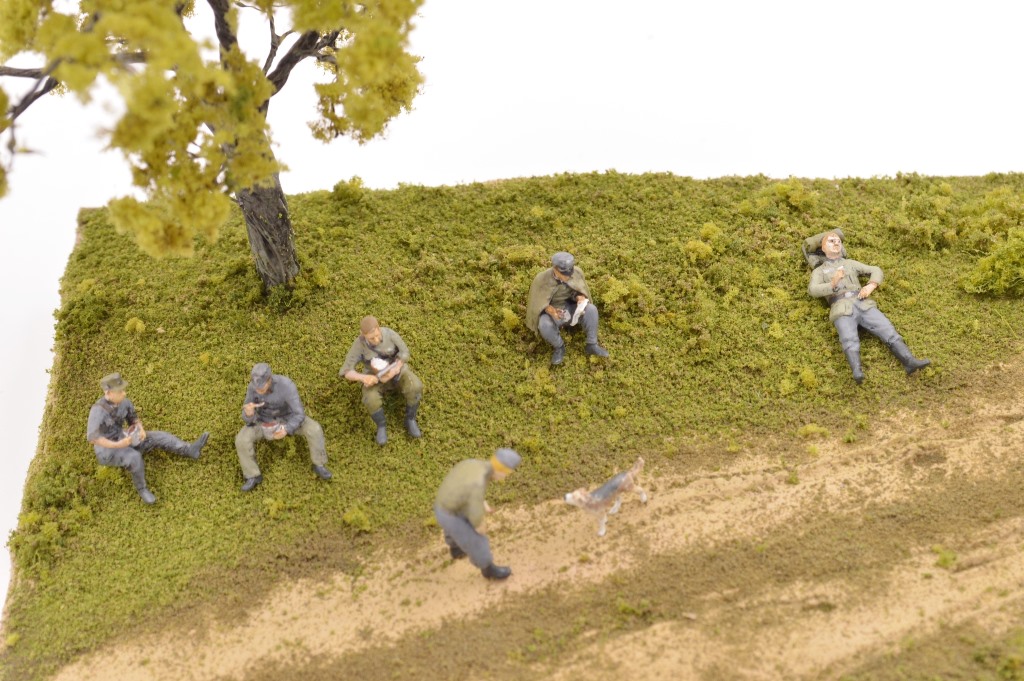
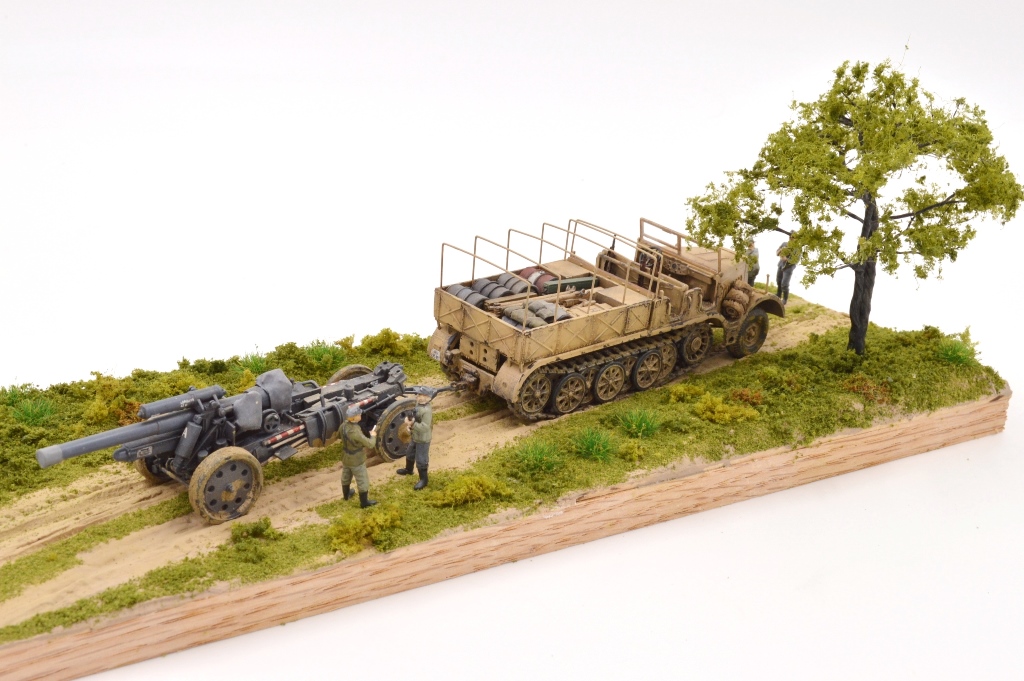
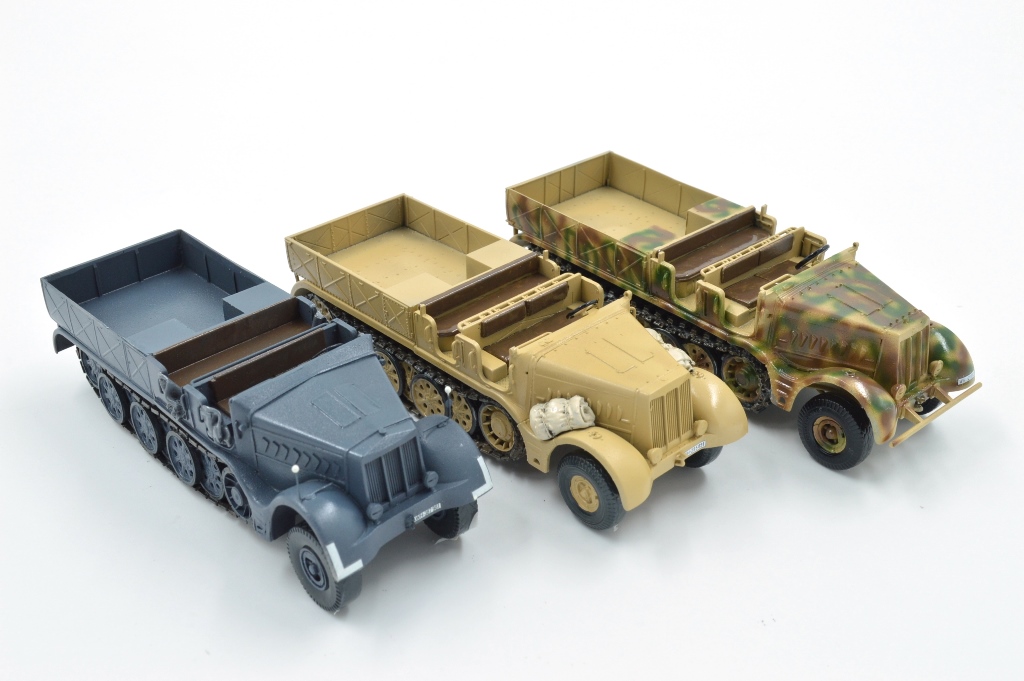
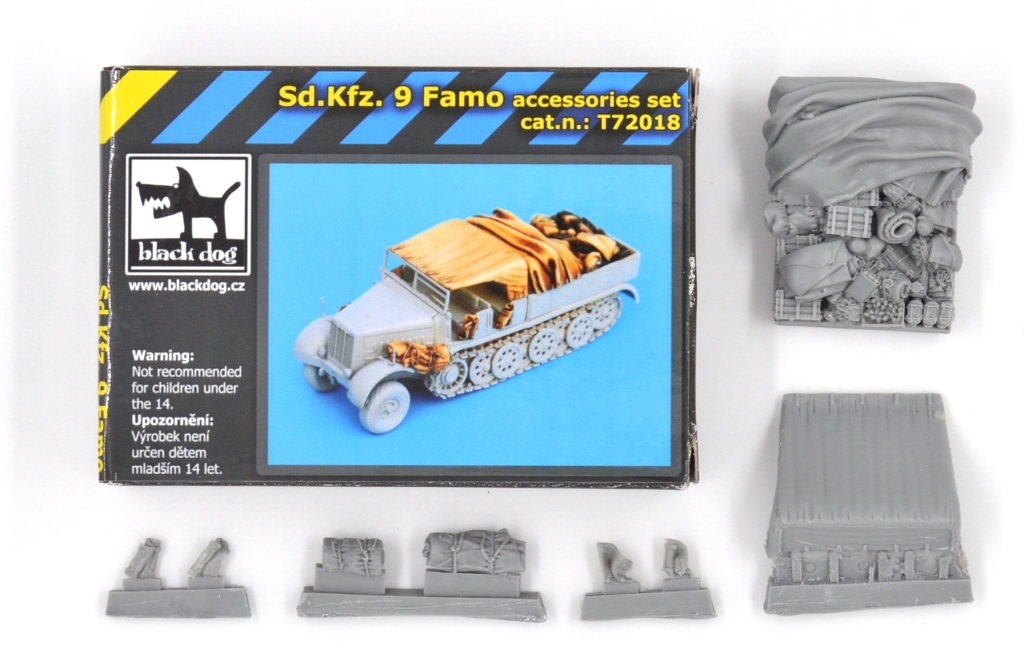
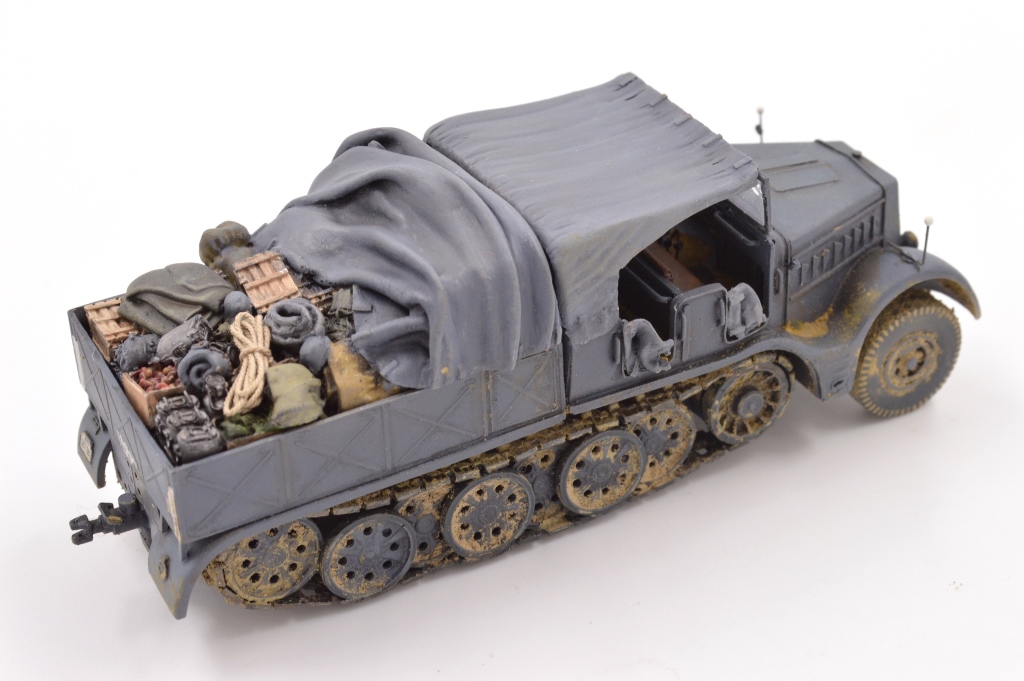
I present three dioramas (or are they vignettes) featuring Sd. Kfz. 9 FAMO Halftracks in 1/72 scale.  The first is a Planet Models resin kit with Black Dog accessories.  The figures are mainly from Preiser set 72505, augmented with others from one of their Luftwaffe sets.  The crew has taken a break for lunch in the shade of a tree.  The dog is painted to resemble one of my own.

FAMODio_21

FAMODio_22

FAMODio_23

FAMODio_24

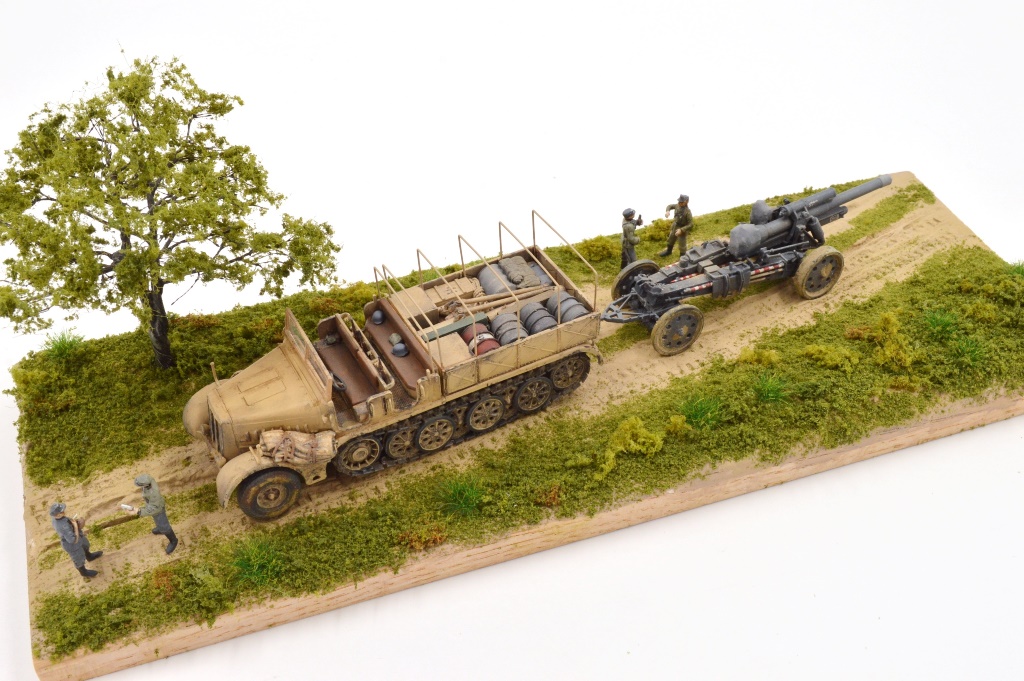
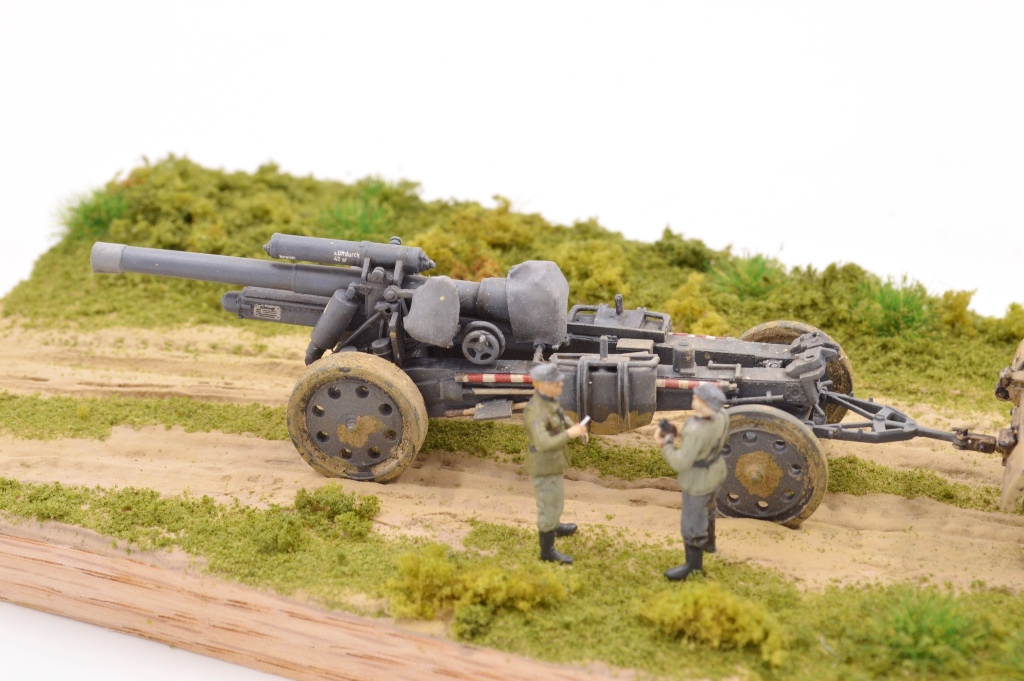
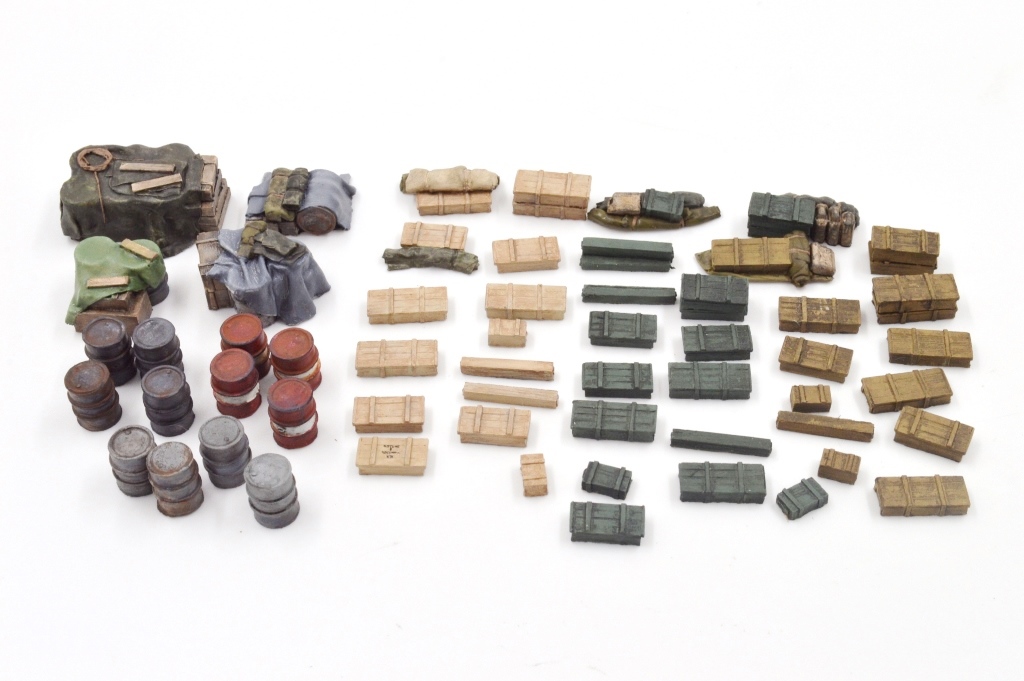
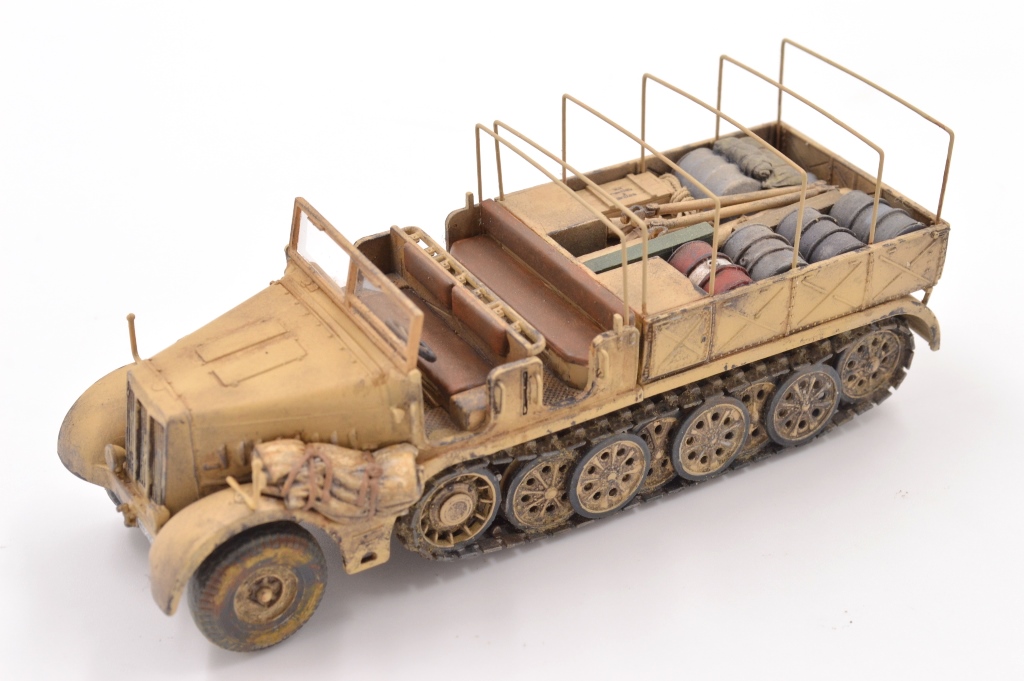
This scene is the Revell FAMO towing an Italeri sFH 18 Field Howitzer, both very nice kits.  The cargo is mainly Value Gear in the bed and Black Dog tarps on the fenders.  Figures are a mix of Preiser and modified artillerymen from the Italeri kit. Value Gear here: http://valuegeardetails.com/UniversalStowage72.html

FAMODio_25

FAMODio_26

FAMODio_27

FAMODio_28

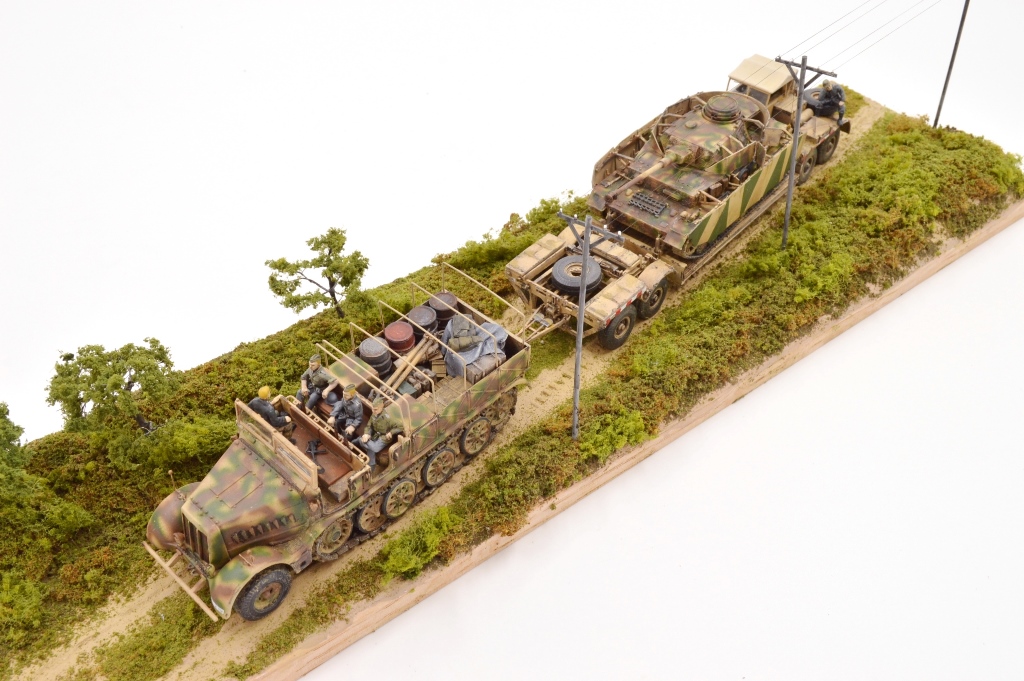
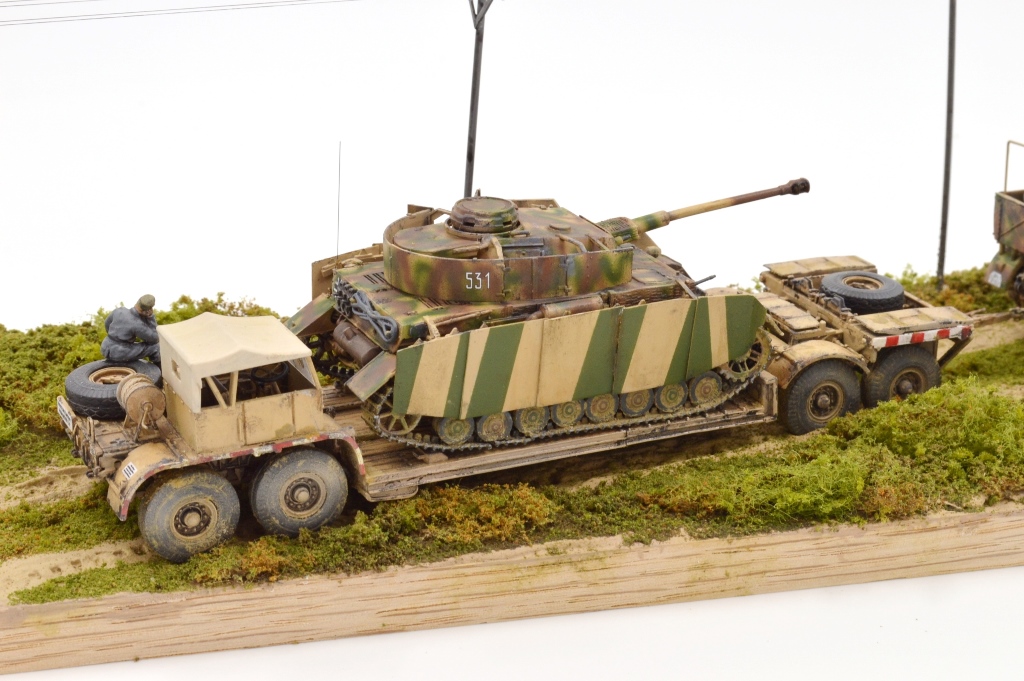
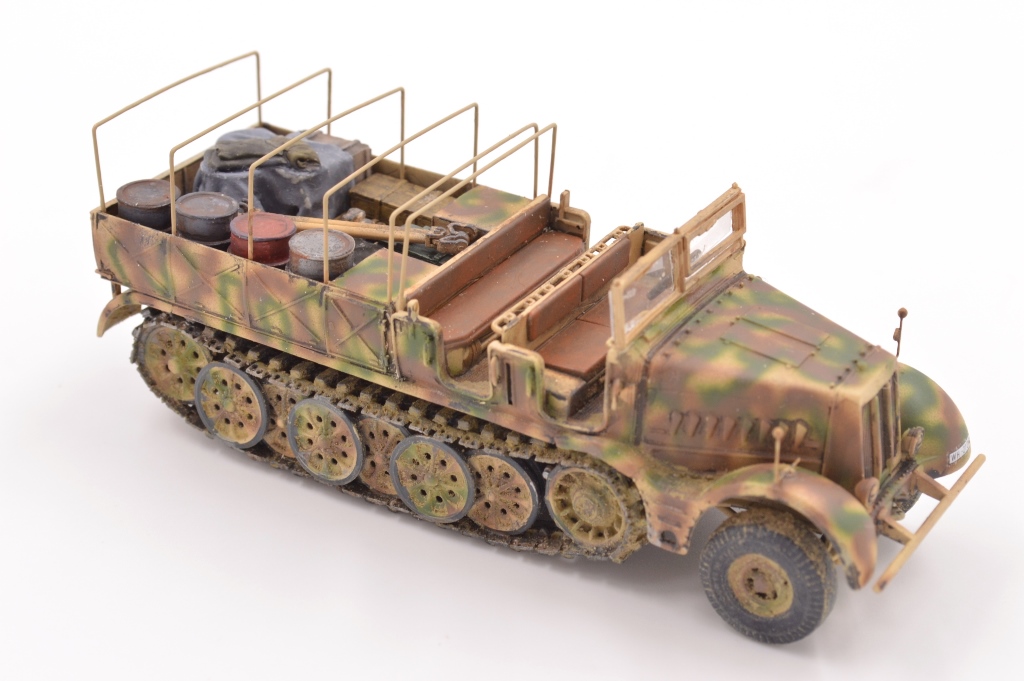
I have recently developed an affinity for tank transporters (like I needed another rabbit hole to climb in) so there will likely be more like this scene in the future.  This is the Trumpeter FAMO and transport trailer with a Zvezda Panzer IV.  Figures are from the CMK set designed for the FAMO and a few from Caesar, Value Gear stowage in the bed again.  I like the casual poses, particularly the bored guy on the back of the trailer.

FAMODio_29


FAMODio_30


FAMODio_31


FAMODio_32


Construction posts here:  https://inchhighguy.wordpress.com/2020/12/18/sd-kfz-9-famo-halftrack-comparison-build-in-1-72-scale-part-i/

Trumpeter Sd. Kfz. 9 FAMO Halftrack in 1/72 Scale

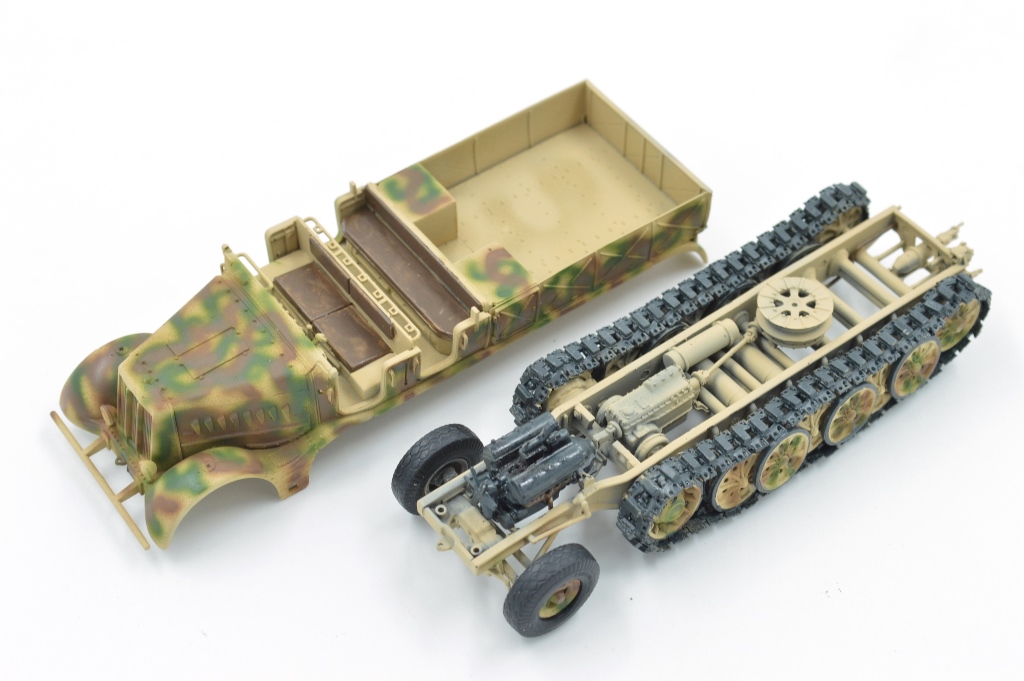
This is Trumpeter’s FAMO kit number 07203 which was issued in 2005.  This kit has been issued in several versions and boxings over the years and is still available.  Trumpeter’s kit is the most detailed FAMO and also contains the most parts by far.  Track are individual links and have separately molded rubber pads.  I found the kit to be over-engineered and fiddly.  The advantages in detail will not be visible from normal viewing angles, but if you wanted to display a FAMO with the hood panels open or over on its side this would be the place to start.  Value Gear cargo is in the bed.

DSC_7537

DSC_7538

DSC_7539

DSC_7540

DSC_7573

DSC_7574

DSC_7575

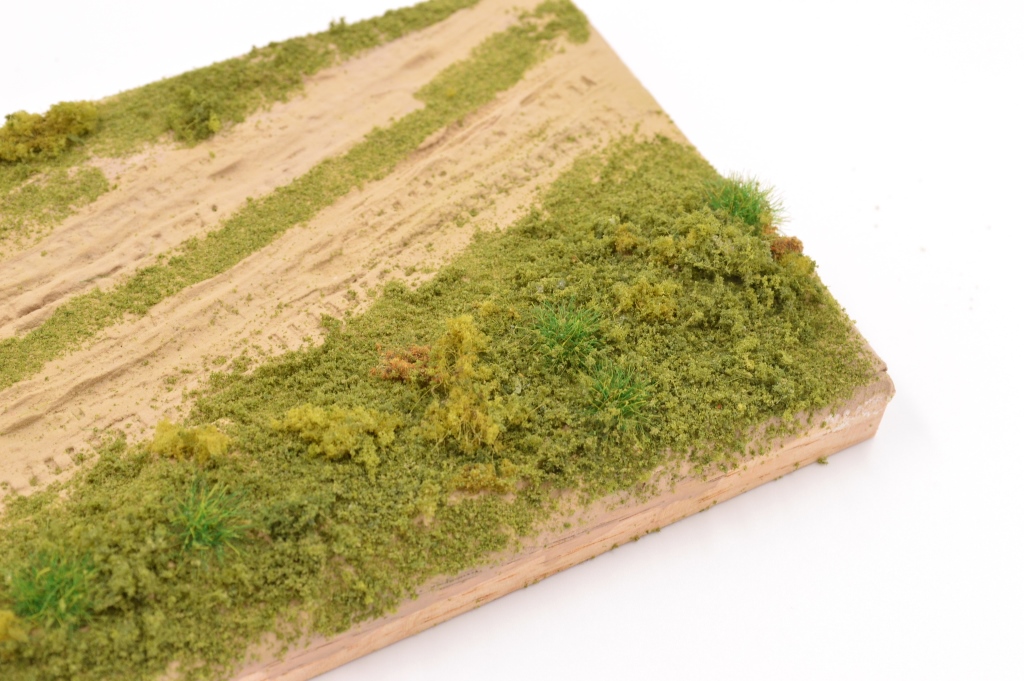
Diorama construction here: https://inchhighguy.wordpress.com/2021/01/08/sd-kfz-9-famo-halftrack-base-construction-in-1-72-scale/

Sd. Kfz. 9 FAMO Halftrack Base Construction in 1/72 Scale

FAMODio_01
I never know what to call these – bases, dioramas, or vignettes. The modeling definitions differ from what is described in the dictionary, and IPMS has imposed rather arbitrary criteria of their own for show categories which has resulted in some humorous anecdotes. Personally I think basing a model adds a lot to the presentation but I am usually so eager to start the next build that I skip the base entirely and move on. This time I decided to resist that impulse. Here is the start – a 4.5” x 12” (11.4 x 30.5 cm) section of Oak trim from the hardware store with some strips glued in the corner to vary the terrain.
FAMODio_02
I also picked up some spackle to shape the groundwork. This type really is lighter than you would expect, likely microballoons are part of the mix.
FAMODio_03
The spackle is spread over the base and smoothed. After letting it set up a bit I made tire tracks by rolling some spare wheels over the road area and then added track marks by pressing the model into the mix. I also made sure to press the model into the groundwork where it will be located in the final scene. The dirt color was mixed from several old bottles of acrylic paints – at last I found a use for them. There is a crack in the spackle despite what the label says, fortunately in a place which will be covered by weeds.
FAMODio_04
These trees are made by twisting the wire in lamp cord. This was my first time trying this method, I found it an enjoyable exercise. I printed pictures of bare trees so I could be reminded of what I was trying to achieve. The solder on the trunk of the tree to the right didn’t work well, the copper wire dissipated the heat too quickly. In the end I used CA to bond the wires which did work.
FAMODio_05
Here are the trees after two coats of Mr. Surfacer 500, a coat of RLM 02, and wash of Tamiya black wash. I applied all that with a brush, I think it would go better with an airbrush next time. These trees are roughly 4” (10 cm) in height, more or less.
FAMODio_06
I made a few smaller trees as well, these are roughly 1.5” (3 cm) or so. The “foliage” is from Woodland Scenics, commonly used by model railroaders. I have accumulated quite a variety of their products over the years, fueled by a combination of clearance sales and my over-active ambitions.
FAMODio_07
Here is a corner landscaped with various Woodland Scenics turfs and bushes. The brighter green grass tufts are another model railroad product from Bachman, these are the 6 mm size tufts.
FAMODio_08
The vertical element of this base is provided by one of the larger trees. When trees grow in isolation they tend to spread out their branches like this one, in groups they grow higher but more narrowly
FAMODio_09
Preiser figures are really nice but hard to find, I’ve had this set for awhile and have been looking for a good excuse to use it. There are twelve figures in this set and an abundance of head and equipment options so it will not be difficult to make each figure unique.
FAMODio_10
An assortment of figures pinned to sprues and primed for painting. These are a mix of Preiser, Caesar, CMK, and modified artillerymen from the Italeri howitzer kit. Figures are difficult to paint well in 1/72 scale so I have been haunting wargaming blogs and boards looking to pick up some tips. No substitute for practice though!
FAMODio_11
The finished scene incorporates vehicles and figures onto the base. I prefer figures in casual poses, it is much more common to be attending to basic maintenance or daily routine activities than charging into combat. I have made a base for each of my three recently completed FAMOs, each with trees of different heights and various numbers of figures to give the IPMS judges some fun deciding if they are dioramas or vignettes!

Finished dioramas here: https://inchhighguy.wordpress.com/2021/01/14/sd-kfz-9-famo-halftrack-dioramas-in-1-72-scale/

Revell Sd. Kfz. 9 FAMO Halftrack in 1/72 Scale

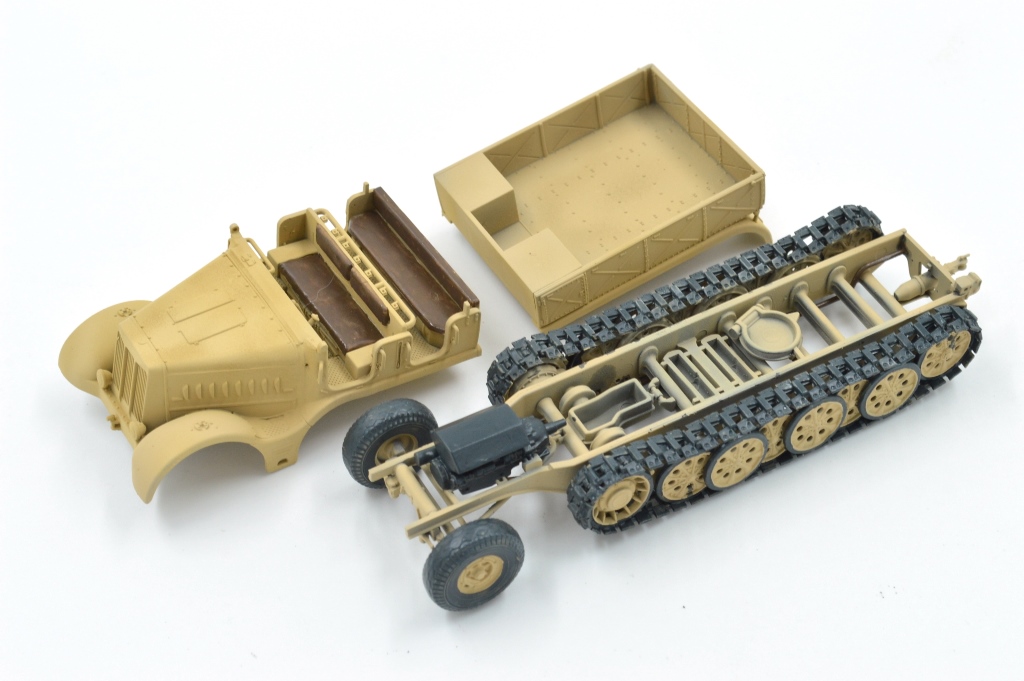
Here is Revell’s FAMO offering from 2005, their kit number 03141.  Tracks are link and length.  I found this kit to be well molded and engineered and a pleasure to build.  The canvas rolls on the fenders are from Black Dog resin, the cargo load in the bed is a mix of Value Gear resin bits.

DSC_7562

DSC_7563

DSC_7564

DSC_7565

DSC_7527

DSC_7528

DSC_7530

More finished FAMO here: https://inchhighguy.wordpress.com/2021/01/12/trumpeter-sd-kfz-9-famo-halftrack-in-1-72-scale/

Planet Model Resin Sd. Kfz. 9 FAMO Halftrack in 1/72 Scale

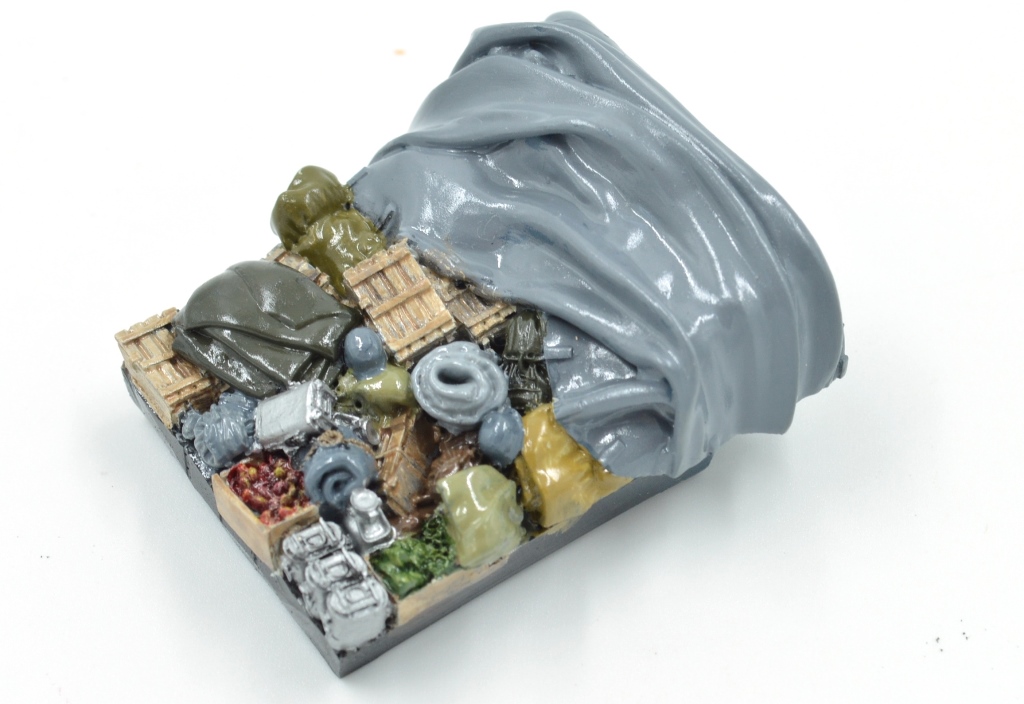
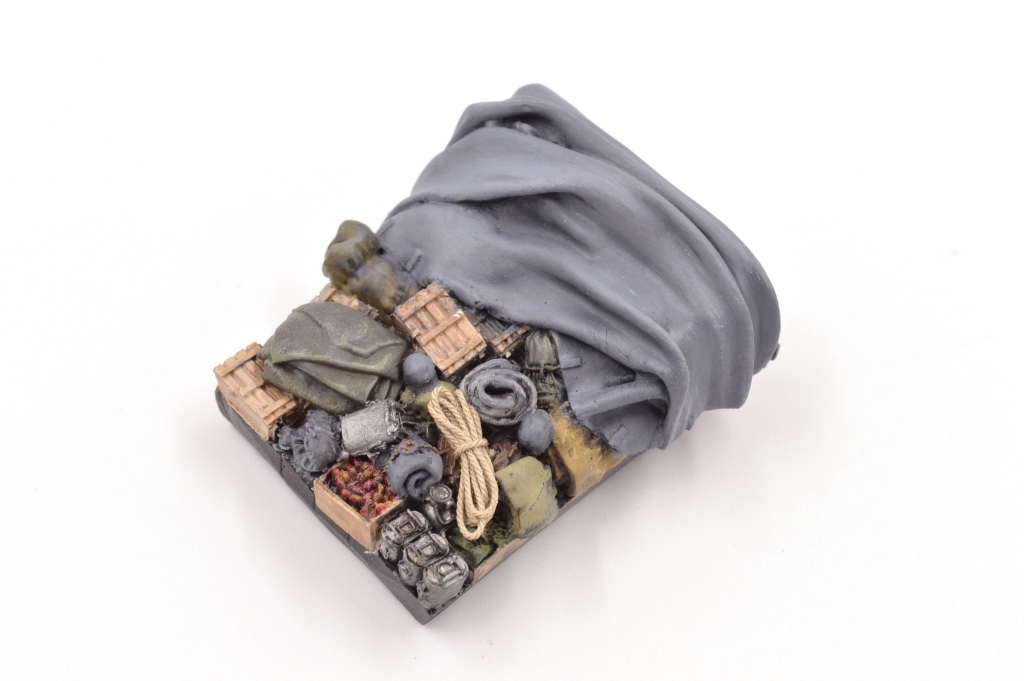
This is Planet Model’s kit number MV 024, a multimedia kit released in 2002.  Detail parts are provided on a small photoetch sheet and tracks are rubber.  There is a low parts count as the chassis frame and running gear are simplified which is readily apparent when viewing the underside but not obvious from normal viewing angles.  I used most of the Black Dog resin set on this one and tried my hand at blending with oils on the canvas parts.

DSC_7559

DSC_7558

DSC_7560

DSC_7561

DSC_7531

DSC_7533

More finished FAMO here: https://inchhighguy.wordpress.com/2021/01/07/revell-sd-kfz-9-famo-halftrack-in-1-72-scale/

Sd. Kfz. 9 FAMO Halftrack Comparison Build in 1/72 Scale Part III

FAMO_21
The kits were each primed with Mr. Surfacer 1000 to check for flaws, then recesses and shadow areas received a coat of Alclad black primer.

FAMO_22
The Planet Resin model was painted Panzer Gray with a darker mix from below and a lighter mix from above.

FAMO_23
This is the Revell kit with the tracks and rubber parts of the road wheels picked out.

FAMO_24
The Trumpeter kit got bands of green and brown camouflage colors.

FAMO_25
Here are all three together under a glosscoat after decals have been applied.

FAMO_26
The FAMO looks a bit naked without some cargo. Black Dog makes a nice set for the FAMO, the section for the bed is a large chunk of resin representing a mixed cargo load and a loose canvas cover. I liked this set for the Planet kit as it will help make up for the reduced surface detail compared to the other two models.

FAMO_26b
The Black Dog resin is seen here painted in basic colors and sealed under a gloss coat. This is a good exercise in detail painting.

FAMO_27
I detailed the some of the cargo with the usual washes and drybrushing, but decided to try a new technique (for me) on the canvas bits by using oils. Black oils were brushed into the recesses and white onto the ridges, then the two were gently blended into grays. This is actually pretty easy to control and relaxing to apply, and I was pleased with the depth and contrast at the end. Like anything new it will take more practice to perfect but the initial results are promising. The rope coil is rigging rope from the Syren Ship Model Company and is woven as rope, not thread.

FAMO_28
For cargo in the remaining two FAMO I ordered the German Fuel Drum and German Ammo Crate sets from Value Gear. I purchased three sets with my order, and VG sent along a fourth set as a bonus! These are nice sets, and a lot easier than casting them yourself.  Value Gear here:  http://valuegeardetails.com/UniversalStowage72.html

FAMO_28b
Here are both sets painted up, enough to load my two FAMO with a bunch left over.

FAMO_29
This is the finished Planet Models FAMO with the Black Dog resin set. The simplified construction is rugged and goes together easily, but it is not as detailed as the injection molded kits. This is the best choice for wargamers if you can find it. The Black Dog resin set adds visual interest while making the kit’s limited surface detail less noticeable.

FAMO_30
Revell’s kit is the best compromise between detail and buildability. Mine carries Value Gear cargo in the bed and Black Dog tarps on the fenders. I made the canvas supports from metal rod, the molded pieces in the stowed position were just not as convincing.

FAMO_31
The Trumpeter kit is the most detailed but is vastly over-engineered, especially in the case of the tracks and suspension which requires constant attention to align. Much of the detail is only visible from the underside so the extra effort is wasted. However, if a modeler wanted to model a FAMO with the hood open or the vehicle on its side, this would be the place to start.

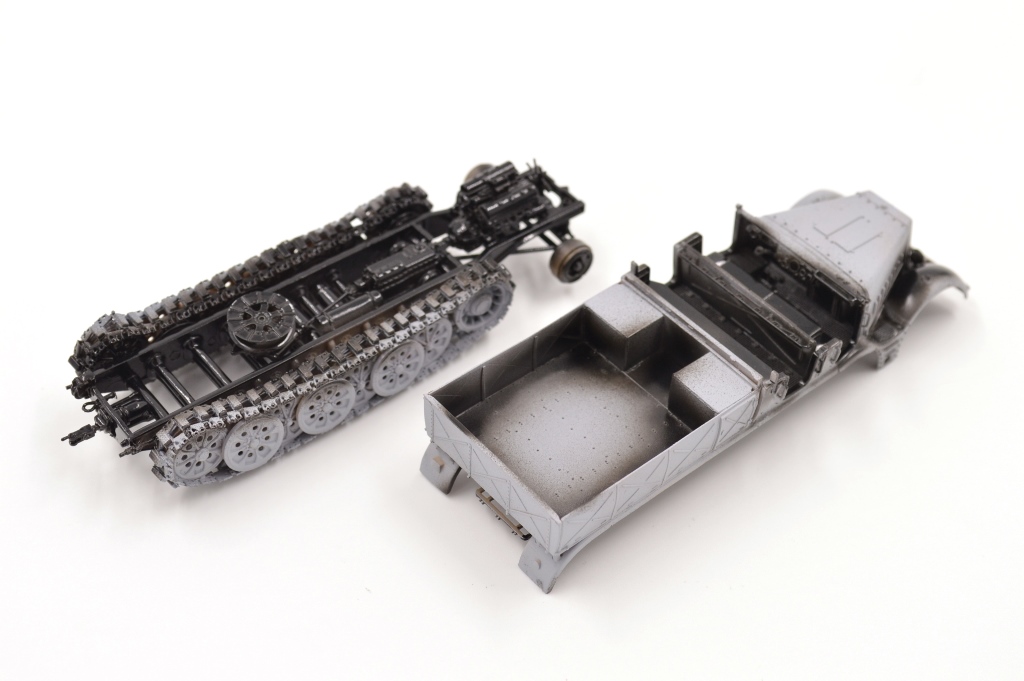
More finished FAMO pictures here: https://inchhighguy.wordpress.com/2021/01/05/planet-model-resin-sd-kfz-9-famo-halftrack-in-1-72-scale/

Zvezda Panzer IV Ausf. H in 1/72 Scale

This is the Zvezda Panzer IV Ausf. H in 1/72 scale, kit number 5017 released in 2018.  I replaced the hull Schürzen with sheet plastic and I added Zimmerit made with Mr. Surfacer 500.  A nice kit and loads of camo schemes to choose from.  Decals are from Kagero Top Colors 32 and depict a Panzer IV from the 116th Panzer Division in Normandy, August 1944.  I found the mixed camo patterns of the hull Schürzen and the rest of the vehicle interesting.

DSC_7551

DSC_7550

DSC_7549

DSC_7548

DSC_7518

DSC_7519

DSC_7520